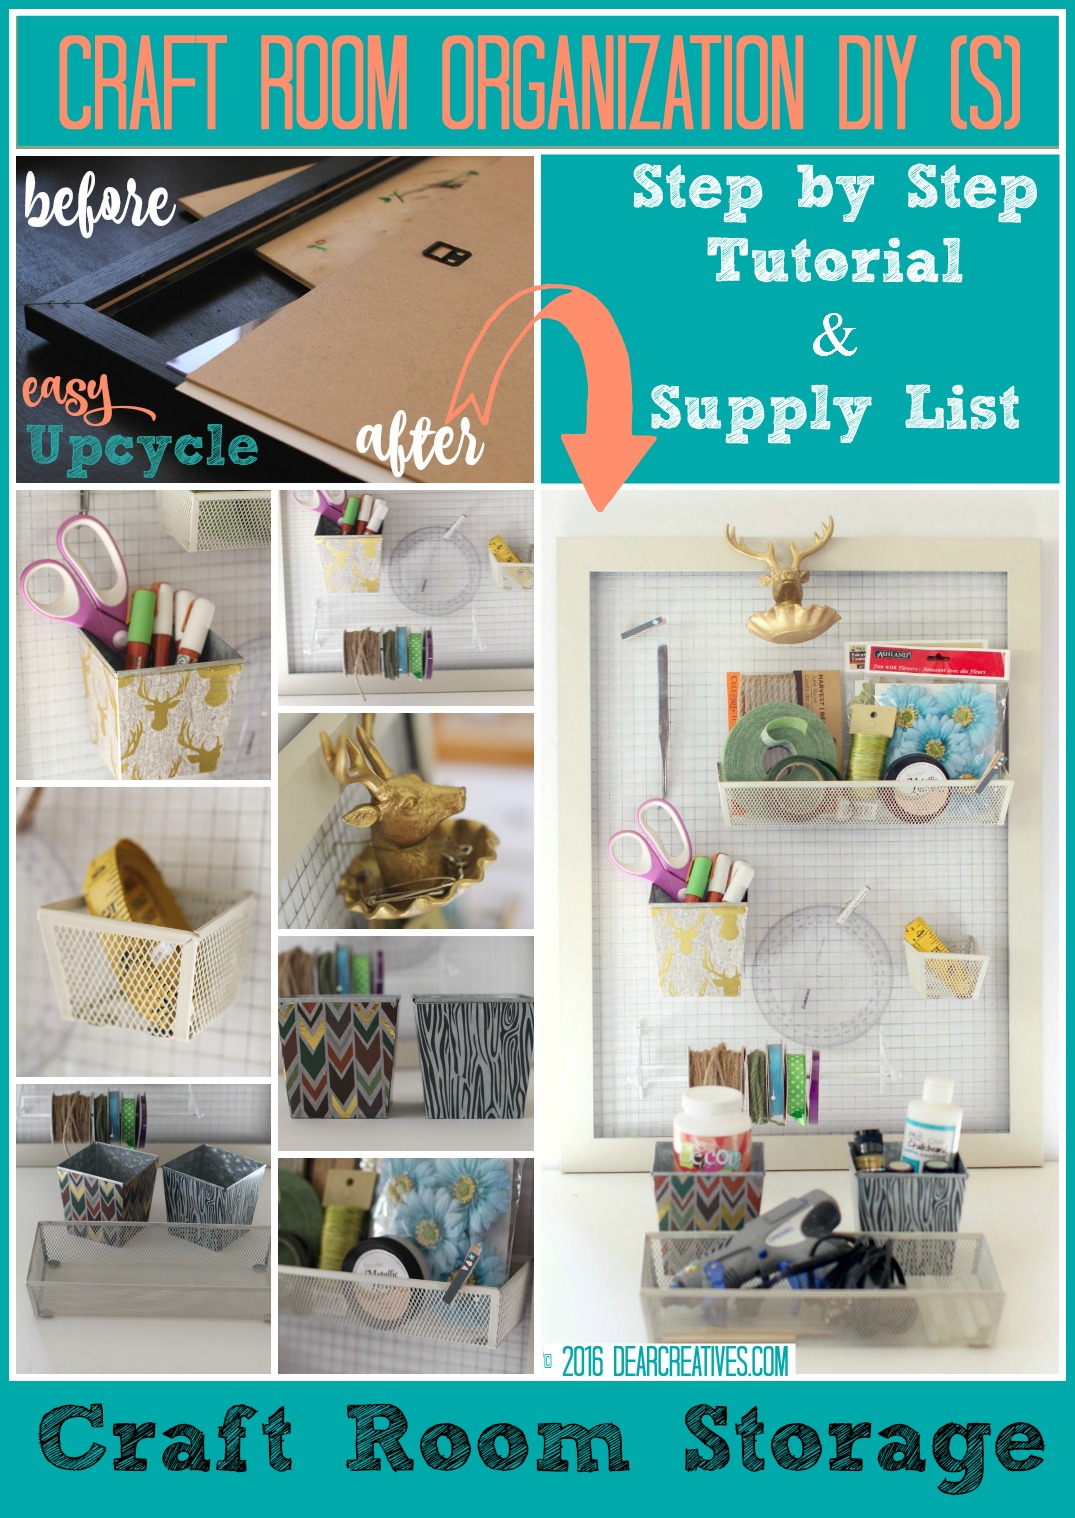
Craft Storage How To Build A Budget Friendly Wall Organizer
We have a craft storage solutions for your craft rooms. Have you ever thought of streamlining and organizing your craft supplies? I created wall organizer for my craft space to improve my home organization. This was a budget friendly diy. I made this craft storage idea because I wanted to have a few of my most used craft supplies in my craft space. Easy to grab, use and make things with.
I decided this year that I am going to go through my arts and craft supplies. Really dig deep and keep only keep those supplies that I'll be using again and again. Clearing out clutter, focusing on keeping the things that matter.
Craft Storage
Build a wall organizer to keep the tools needed for specific projects to be at hand right where you need them. This is a pretty way to have your craft things on hand.
If this isn't the diy project you want you might like how to build a small cabinet for storing and organizing your things. Or see this post with 25 Craft Room Organization Ideas
Wall Organizer
Do you ever find yourself putting away your supplies only to ask, “where did I put ____?”. Yeah, too many times when company is coming I put things neatly away only to find I can't find those items. I looked at craft storage ideas and some pre made can be quite costly. I've seen the pretty peg boards and actually have a design to make something. I just need to get around to it when the weather is better for cutting wood. It's more involved and has a space for cork board and other things (stay tuned).
DIY Craft Storage
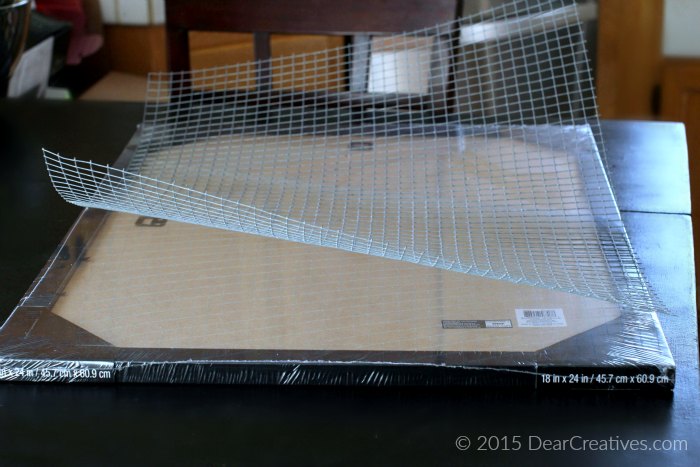
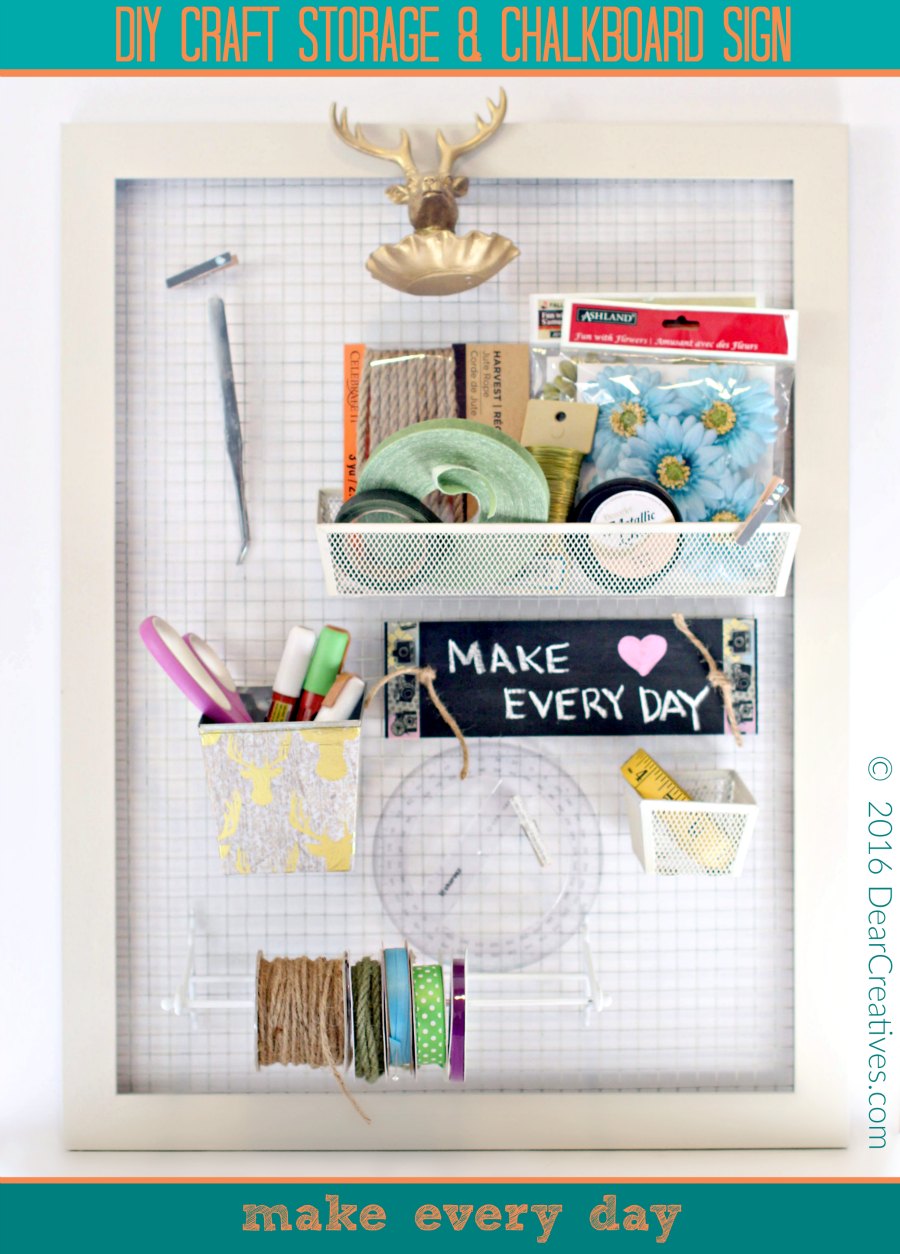
Then I was walking around Michaels Crafts to see what they had. I loved a $45. frame with wire but, there was no storage. “Lightbulb moment.” I've seen those wire frames before but, they are for jewelry or cards. I decided to buy an inexpensive frame, good stainless steel wire and get to work. Here's a few of the supplies you'll need to create one.
What you will need to make this wall storage
Supply List
- Picture frame
(18 x 24) or size you'd like or re-purpose a large frame you have! It is best if it's a wood frame
.
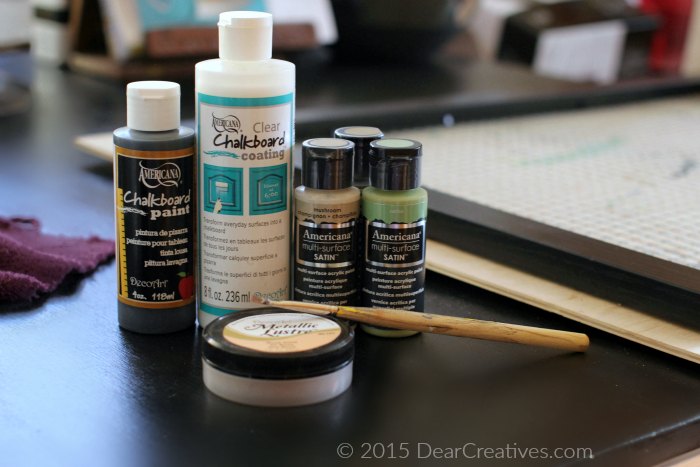
- DecoArt Multipurpose Satin Paints: There are lots of pretty color choices!! (I used Americana multi-surface Satin in Mushroom) * I used 2 oz. entirely I'd get more depending on how much your painting
- Wire hardware cloth 3′ (or mesh screen, strong chicken wire
to size your frame will need)
- Wire cutters
(to cut wire cloth to frame size)
- Mini pliers
(for pulling your frame backing off) I hate braking nails. Don't you?
- Gold wire or stainless steel wire (strong for tying on your storage items)
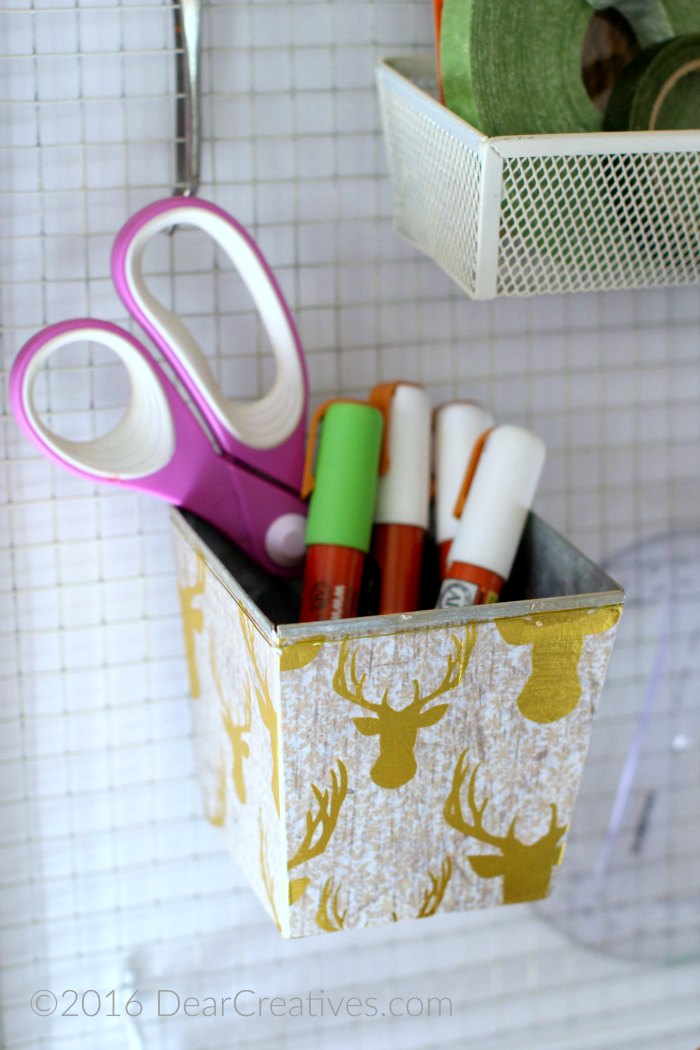
- DecoArt Decou-Page Papers they come with 3 designs to each package. I used (Gold Stag) and ( Arrows *which has the wood grain)
- Decou-Page Glue
- Paint brush Flat
- Foam Glue Brush
- Paper towels or an old used towel
- Storage bins * I used drawer organizers (Room Essentials which I grabbed at Target in Office Supplies) It will leave you with a few extras to paint and use on the counter. I painted them with the Mushroom Satin.
- Recollections™ Slat Wall Metal Ribbon Bar I found mine at Michael's
Supplies for Chalkboard Storage Sign
- *not shown in image above
- wood (cut to size you'd like)
- drill
- pencil and ruler
- Americana Chalkboard Paint
- Ribbon or Twine to tie it to organizer
DIY Wall Organizer
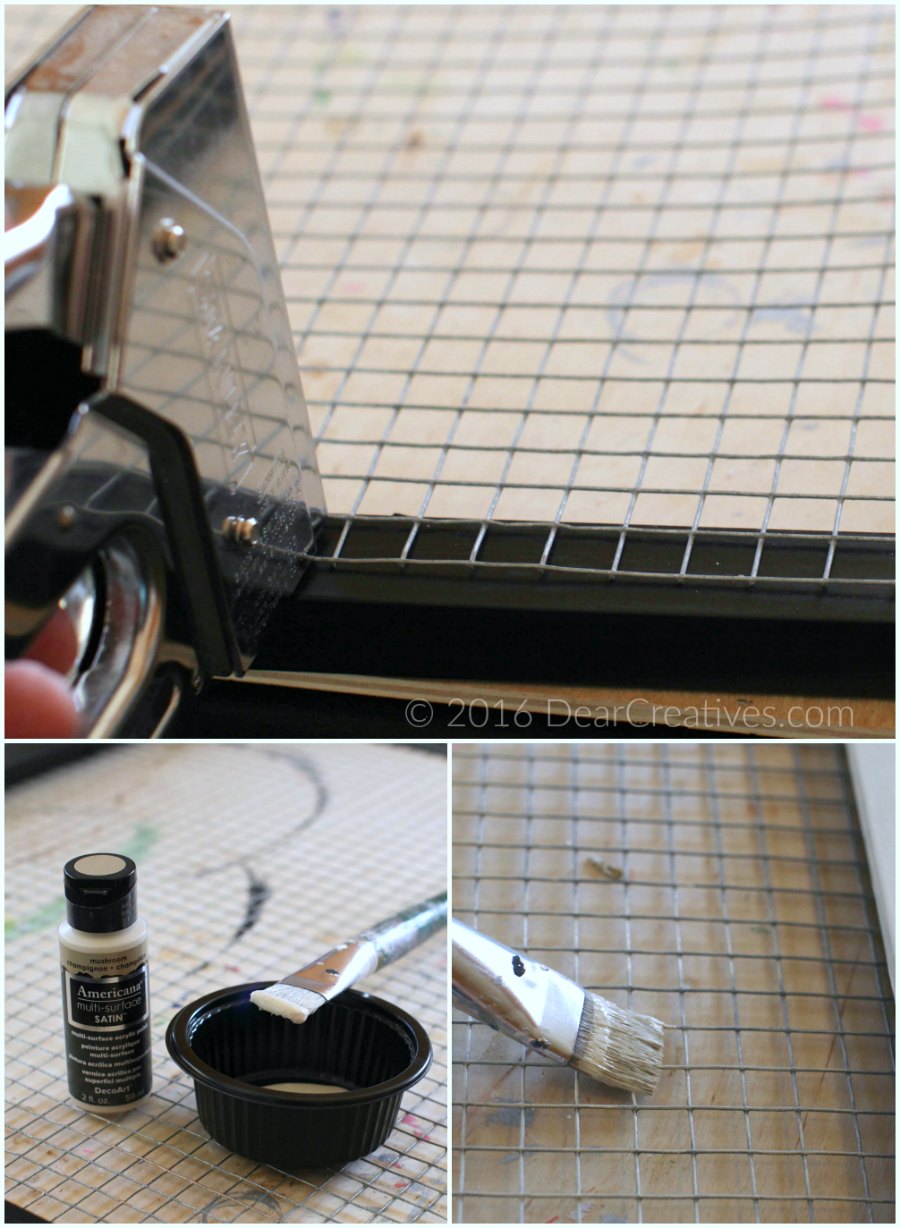 Follow the directions below. TIP: A tip for painting the wire is don't have brush loaded fully as shown on left have a small amount on brush and pull over the top like your dusting. Do this a few times and it will cover nicely without big globs of paint falling through. On tighter mesh for bins do the same. If you start to see clumping push it through with bristles of the brush and wipe with fingers. You can seal the paint coating when it dries if you like for better protection but, I didn't.
How to take a picture frame and make it into wall storage
- Disassemble your frame. Be careful if you have glass in it, mine was plexi glass. If your frame needs prepping sand and wipe clean
- Sometimes sanding a little gives it a tooth for the paint to adhere just make sure to have it dust free when painting
- Measure and cut wire to size
- Next carefully use a staple gun and staple to frame (no kids, pets or fingers nearby!) I bent a few. You can pull them out with pliers. It happens.
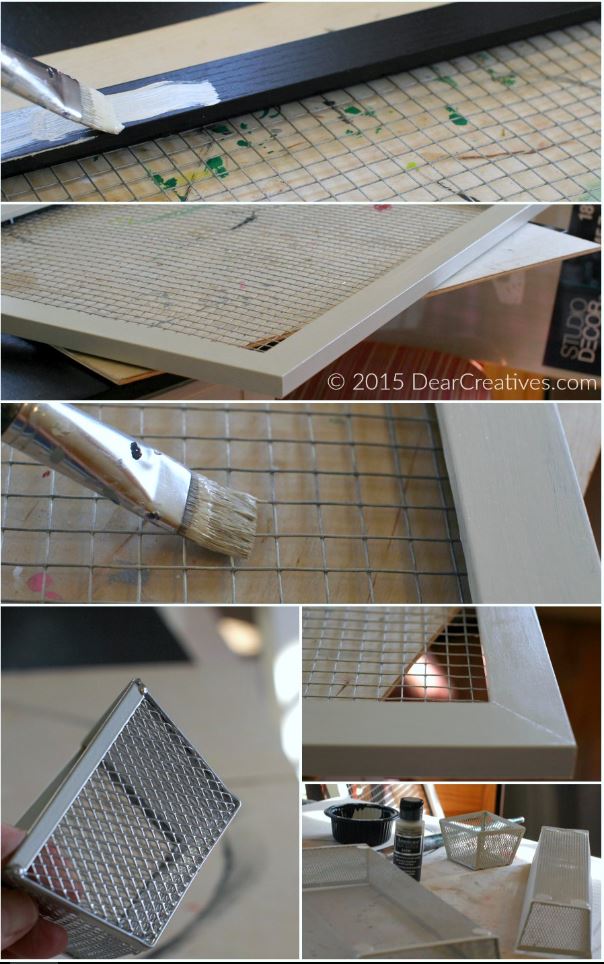
- Flip to right side and Paint. Letting coats of paint dry in between. Play with the kids, pet the dog, make lunch. It will take about 2-3 coats depending on color your covering or condition of your frame. I have a ceiling fan I turn on which speeds up dry time. Also the warmer your house is will speed up dry time. If you paint it outdoors have it on a plywood board to bring in to dry if it's winter.
- Pet the sleepy, patient dog. On this day Sammie was at a friends house so I painted the organizing bins and decorated others with pretty papers.
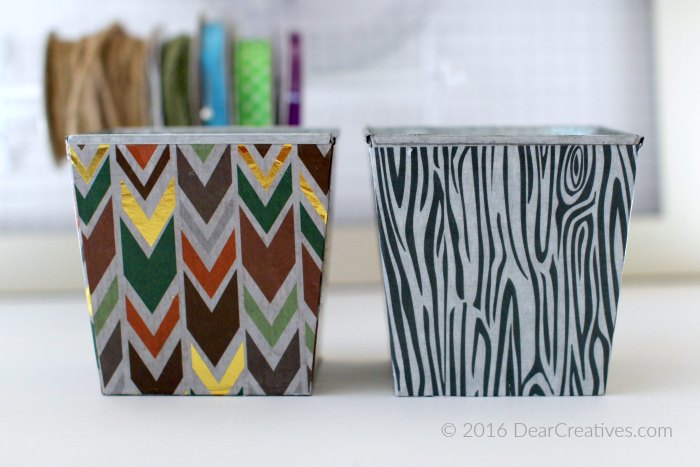
- Then I added Decou-Page to three stainless steel planters. First cut paper to size for each side. Trim after gluing. Add Decou-Page glue, carefully add paper. Carefully smooth out air bubbles. Give it a coat on the outside when done and let dry. (I'll have another step by step tutorial for this soon but, it's really easy to do!) With sticky fingers it's hard to take photos.
- Measure wire for adding storage bins to wired frame (be sure not to get close to frame and nick your paint job) For ones without wired holes I secured wire around tin and used pliers to tighten prior to threading through mesh. It held nicely. Be sure to use good gauge wire. 18 or 20 gauge the lower the number the stronger the gauge.
- Thread through mesh and attach
- Fill it up and hang on wall
- I didn't back it but, you could. You'd just have to make some slight adjustments to design. Or cut a piece of wood to fit the back. Paint or paper it first prior to attaching.
Craft Storage Chalkboard Sign
Next I wanted to make a sign to remind me to make something everyday! Or change it for other reminders.
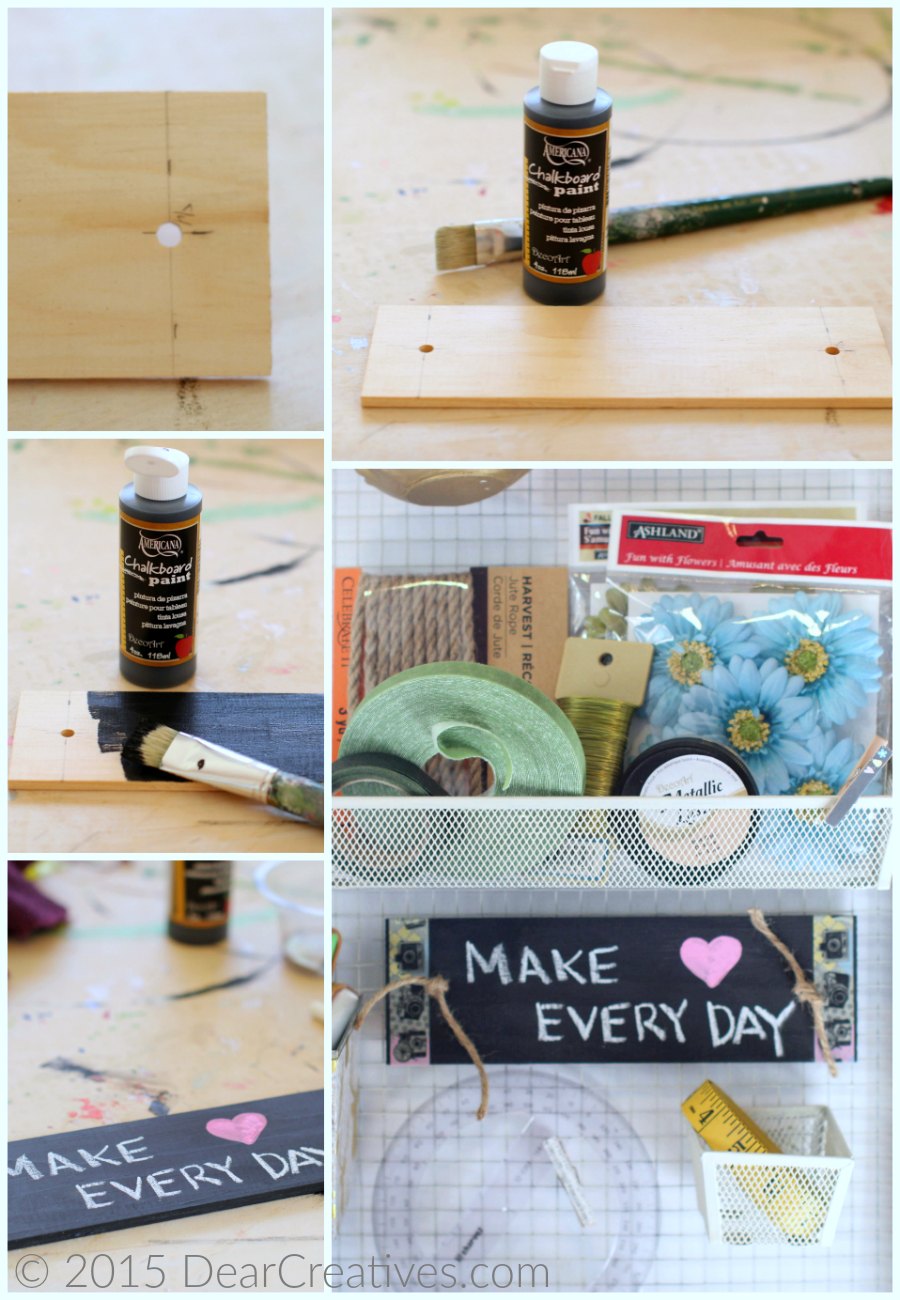
Directions for small wood chalkboard sign
- Cut wood for sign to size you'd like. (mine was 9″ x 3″ x 1/4″)
- Measure equal distance from ends (dead center) drill two holes one on each side ( 3/16th”or 1/4″ )
- Sand if necessary, wipe clean
- Paint with chalk paint. Give it 2 coats letting dry in between and let cure for 24 hours. *follow directions on bottle
- I embellished my ends with washi tape
- Chalk your saying onto the board
- I looped twine around back of wire and through hole, tying it the front. Finishing with knots.
- TIP: tape ends of twine tightly, fit through hole take off scotch tape!
I can't wait to share what I did with the left over backing from the frame. It involves green paint and clear chalk paint!
- New here? Don't forget to Subscribe and add us to your inbox.
- I am a blogger for DecoArt All opinions, text and images are my 100% honest and my own.
What types of craft room storage will you be making soon?