This post contains links to affiliate websites, such as Amazon, and other affiliates. We receive an affiliate commission for any qualifying purchases made by you using these links. This is at no additional cost to you. We appreciate your support!
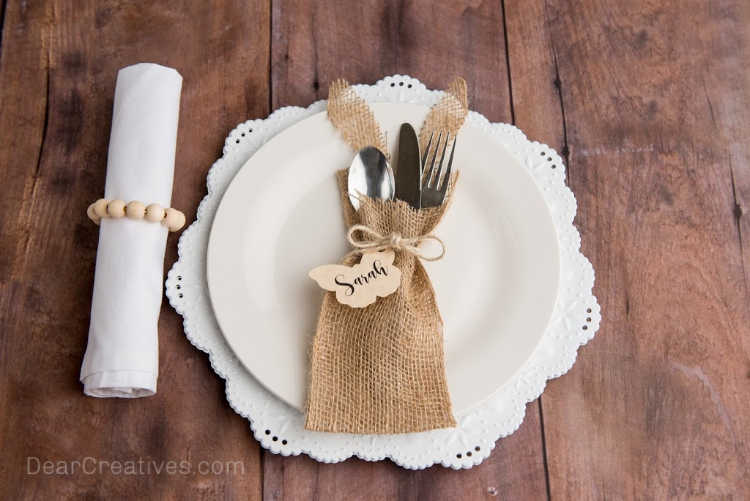
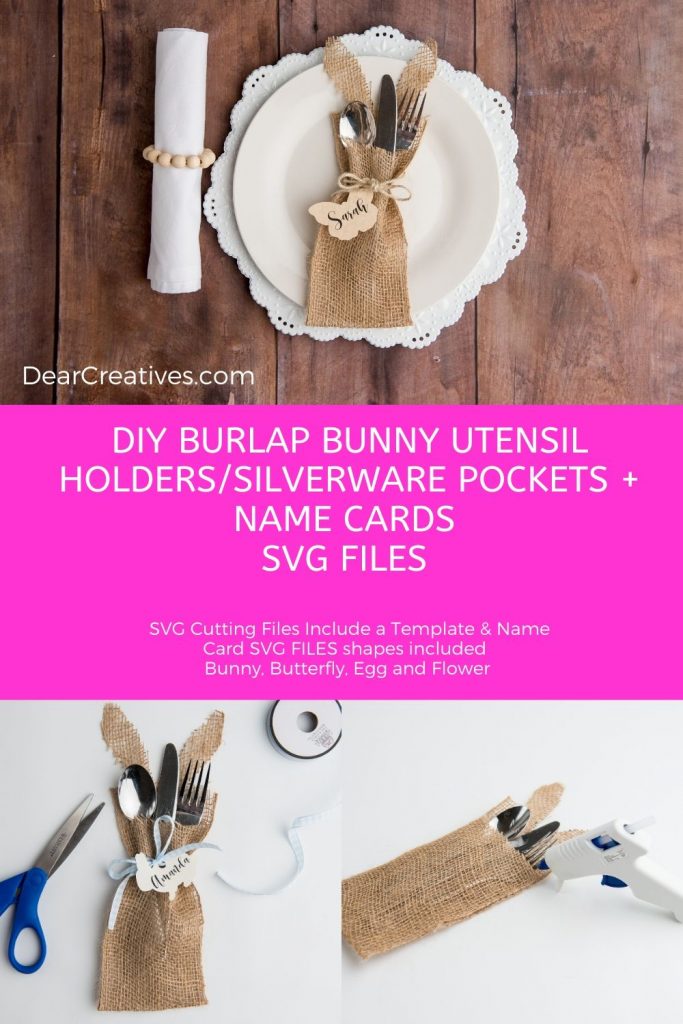
Are you ready to make DIY Utensil Holders? Or are you looking for Cricut Crafts to make? Grab our Cricut craft tutorial and learn how to DIY Burlap Bunny Utensil Holders -These are a perfect addition to make for Spring crafts, Easter Crafts, Summer crafts, or a bunny-themed party…
The DIY silverware pockets can be made with or without the bunny ears, making this an easy craft to make with your die-cutting machine. This Cricut Craftstutorial includes the SVGcut files and a template to help you make your own silverware pockets. The SVGcut files can be used with other cutting machines besides the Cricut too.
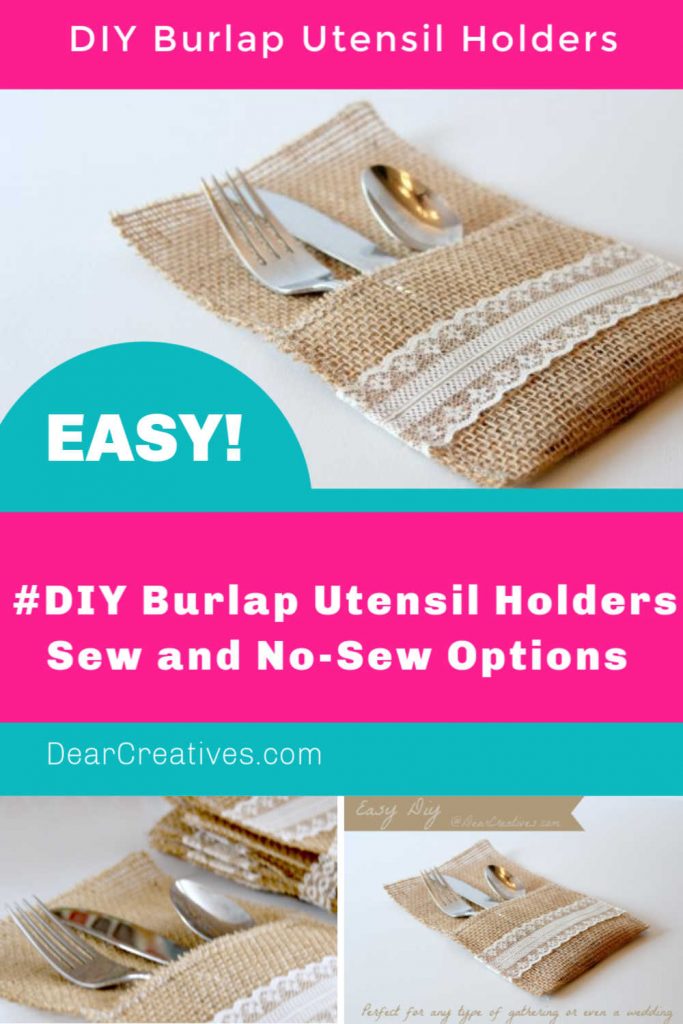
But, don't run if you don't have a Cricut or other cutting machine because we have another tutorial for DIY burlap utensil holders where you don't need a cutting machine at all. We like to keep things easy to make for everyone!
DIY Utensil Holder
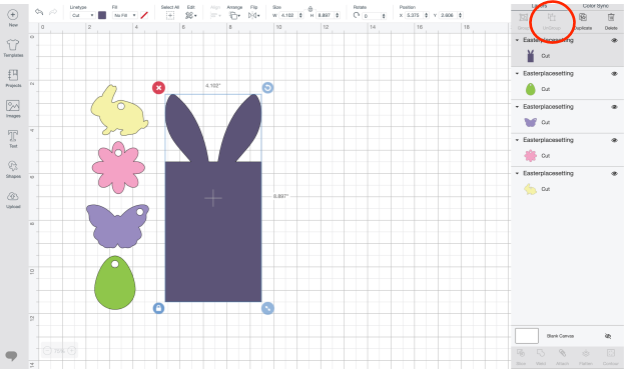
SVG Cut Files Include utensil holder template and SVG Cut files for name tags in the shapes of a bunny, butterfly, flower, oval egg shape. You will find the link to the SVG files with the supply list.
Did some bunny say adorable?
We love decorating our tables for celebrations (even if it's just the family or with guests) and making easy DIY decorating projects. Do you?
I recently updated my original utensil holder tutorial (link below). This got me thinking of all the other cute ideas to make for table settings to try and make with my Cricut. Not to mention how many times I walked by myCricutbut, hadn't designed or made anything lately. I decided to hop on it!
Uses for this DIY silverware pocket/ DIY Utensil Holder
Use it for spring celebrations, for your Easter table settings, baby showers, kid's themed parties, Mother's Day table settings, Summer parties, party table settings, or wedding table settings, anytime you are looking for a rustic table setting. (Perfect for a DIY wedding)…
Note: If you prefer not to make it with bunny ears you can. Just cut it straight across and omit the ears.
Use a homemade or store-bought burlap table cloth or table runner along with this DIY Silverware pocket. Or check out our previous tutorial: Burlap Utensil Holders(With Lace). Perfect for any occasion and so easy to make with its sew and no-sew directions. It's a quick and easy no-sew project for burlap utensil holders (no die-cutter) turns out super cute!
Working in the Cricut Design Space is really easy when you get used to it. I hope this helps you get started creating with this free software.
This tutorial is great for anyone who owns a Cricut. Even if you are a beginner I think you can do it by following the directions.
Or again, you are more than welcome to use our other (tutorial) with no die cutter required.
Let's hop on to today's craft project.
DIY Burlap Utensil Holder – (Bunny)
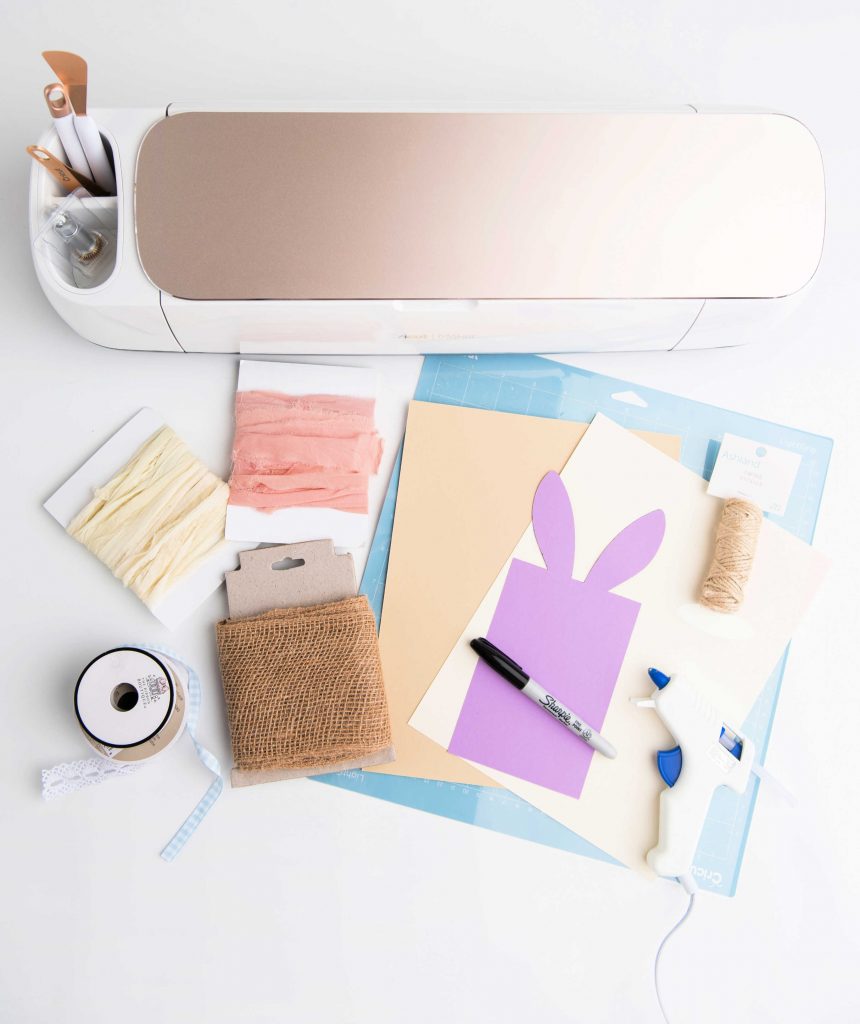
Supplies
Cricut or another die-cutting or digital machine like the Silhouette
Card stock (8.5 x 11” 65-80lb) 1 for tracing template and 1 for tags
Cut out the designs after uploading the SVG files here is how to upload the SVG files and cut your files.
Step 1
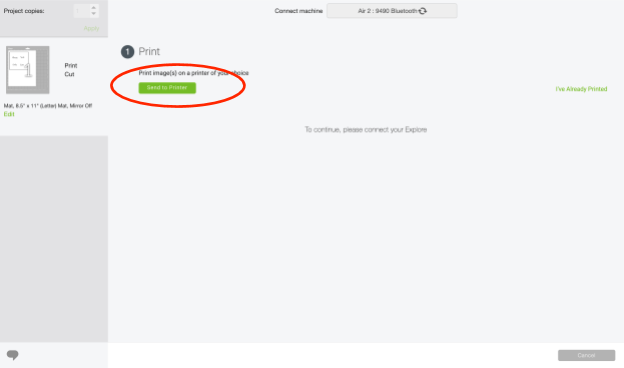
Upload the SVG file to Cricut Design Space. Go to (NEW) project on the left side panel, and click (NEW) to start your new project. Then see (upload) on the left side panel and click (upload) to start loading your SVG files. On the upload screen, you have two options. Pick (IMAGE) to upload the SVG files. Add to To Your Work Space on Cricut Design Space. If you are not sure how to upload your images into Design Space view the PDF I have made and linked below. (STEP BY STEP HOW TO LOAD IMAGES TO DESIGN SPACE)
Don't forget to select the cutting machine you are working on, when in the workspace after the files are loaded. You will find it on the top right (In black area) where it says Explore. It's a drop-down selection. Pick your cutting machine, then continue.
Highlight all layers and ungroup to work on each layer separately.
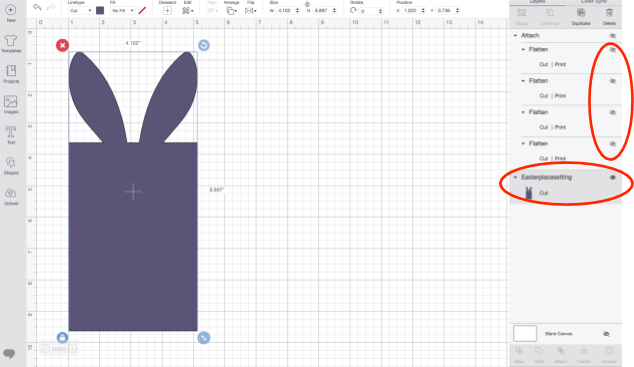
Step 2
Turn off all the other layers – Do this by using the eye icon on the right-hand side of the layers panel, while leaving the purple ear tracing template visible.
After, hit make it cut as normal.
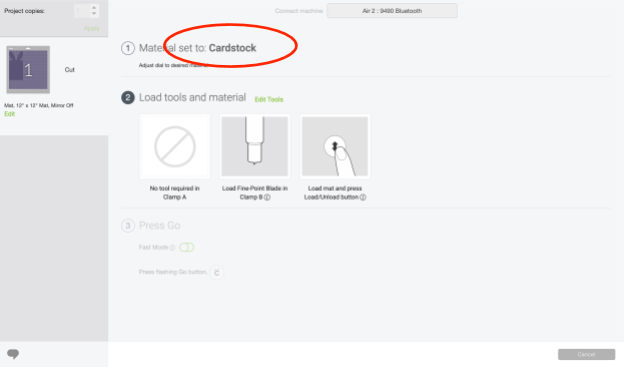
Step 3
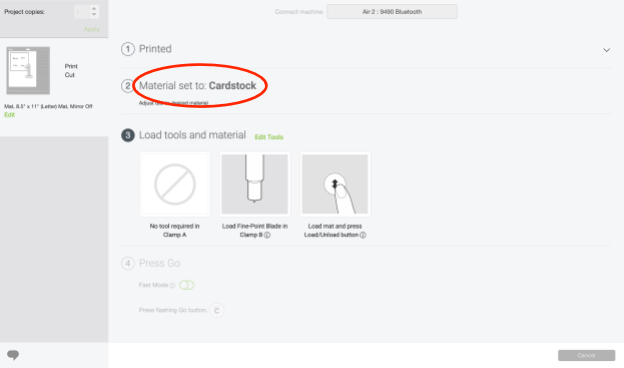
After, hit make and this is how your mat should look. If all looks correct, hit continue and adjust your material dial or setting to medium card stock, more pressure.
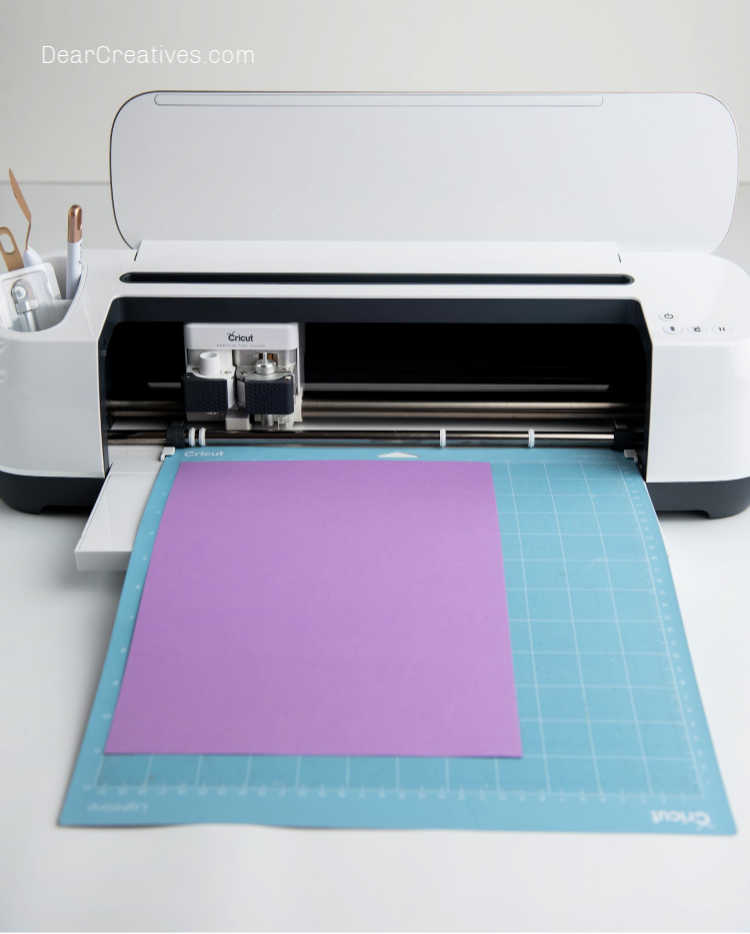
Load the card stock onto a blue light grip mat and hit go
Step 4
Begin working on the place setting name tags
Add and adjust the text in the design space using the text feature and layer on top of each tag.
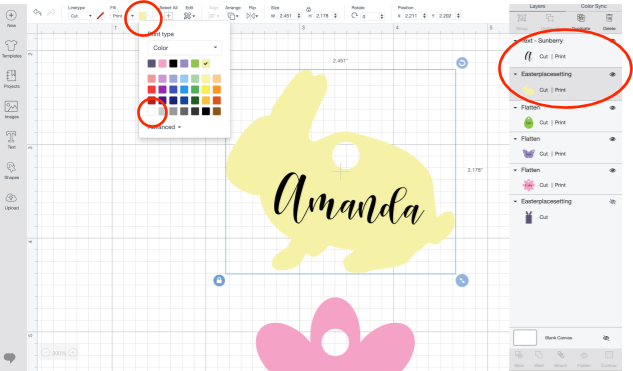
**NOTE: Tags are colored in design space. If the color is not adjusted to white before printing they will print as the color you see. If you would like tags to be white or you would like to print and cut on colored paper (only maker machines can print and cut on colored paper) change the color to white AFTER the text is layered.
Step 5
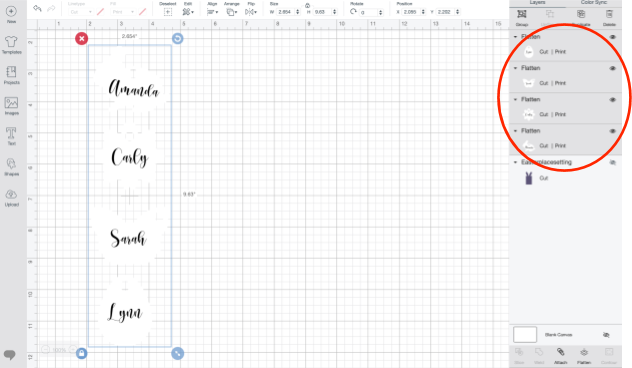
Select both layers (tag and text) and once ready, hit flatten to create a print and cut layer. Flattening will do exactly that, flatten multiple layers as one. After, select Make it, to continue to print then cut.
NOTE: Skip this step and just cut as normal if you would like it to be blank or add a handwritten name by lettering the name with a pen or Sharpie.
This is how each tag should look before printing.
Step 6
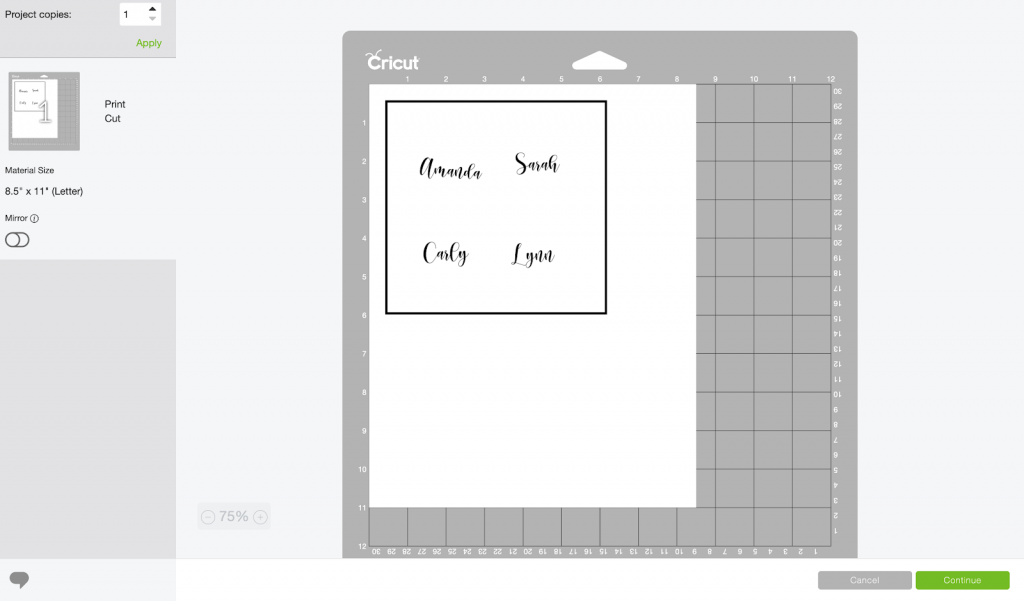
After, hit make and this is how your mat should look.
Don’t be alarmed, the black outline of the tagwill disappear until ready to cut. Only the registration lines will be visible for your machine to read where cuts will be made.
Step 7
Hit continue and print. Once the print is complete, adjust your material dial or setting to medium card stock, more pressure.
REMINDER: Only maker machines will be able to print and cut on colored paper.
Air Explore machines will need to be printed on white paper but will be able to print text in color.
Step 8
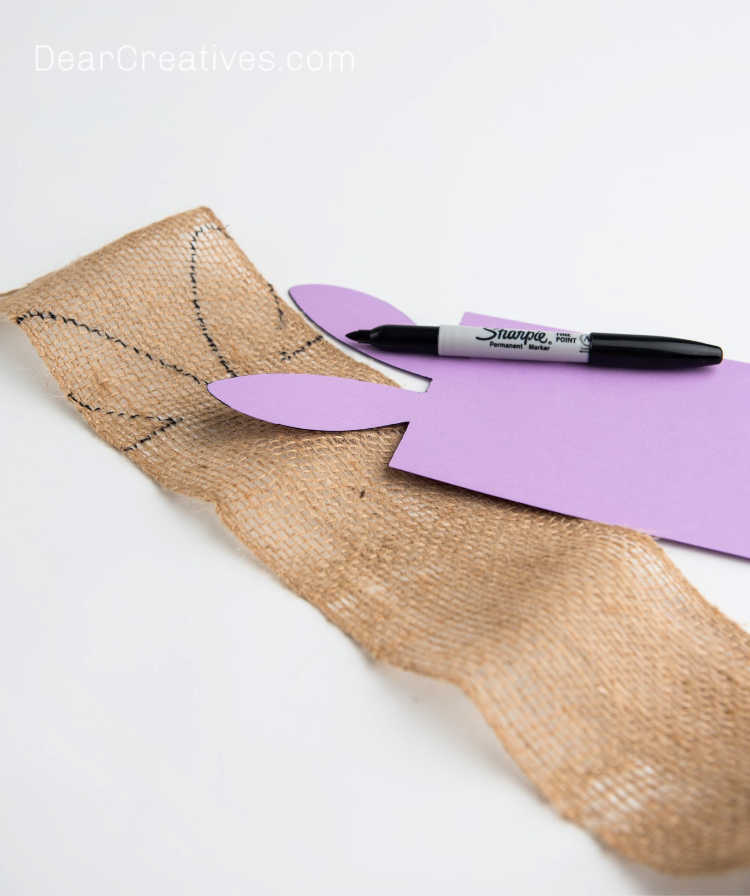
Once all pieces are cut, use the ear tracing template and trace the tops of the ears on the burlap spool.
Step 9
Cut the ears and leave the rest attached to the spool of burlap.
Step 10
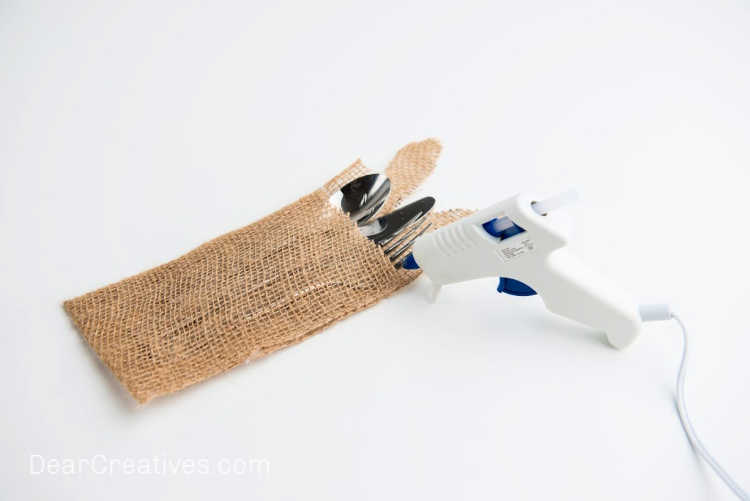
Line up the silverware to determine how long will be needed to cut and fold over to create the pocket.
Step 11
After the length is cut, line up the edges and apply a line of hot glue down each side.
Step 12
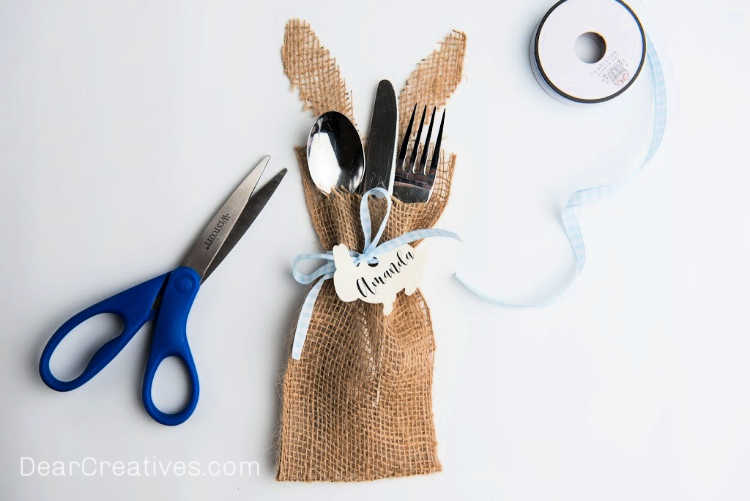
Tie aribbon into a bow from the back of the pocket to the front and add the tags previously cut and you’re finished!
DIY Utensil Holder – (Bunny)
Can you make these from other fabrics instead of burlap?
Yes, cut the template with the SVG files, then follow the same directions but, mark your fabric with a washable fabric pen and assemble using fabric glue or even sew vs. hot glue gun. Then follow the steps 9-12 to complete the project.
Are you making these for Easter? Even if it's just for you and the family this is an easy way to decorate your tables to celebrate or have a bunny-themed party… Not using it now, be sure to pin it for later!
You might try making this Easter Craft and this DIY for how to decoupage wooden eggs and make a spring/Easter Centerpiece.
You might want to make some Velvet Pumpkins to go with these! Visit this pumpkin decor DIY post to see this easy how-to, grab a tutorial to give it a try!