This post contains links to affiliate websites, such as Amazon, and other affiliates. We receive an affiliate commission for any qualifying purchases made by you using these links. This is at no additional cost to you. We appreciate your support!
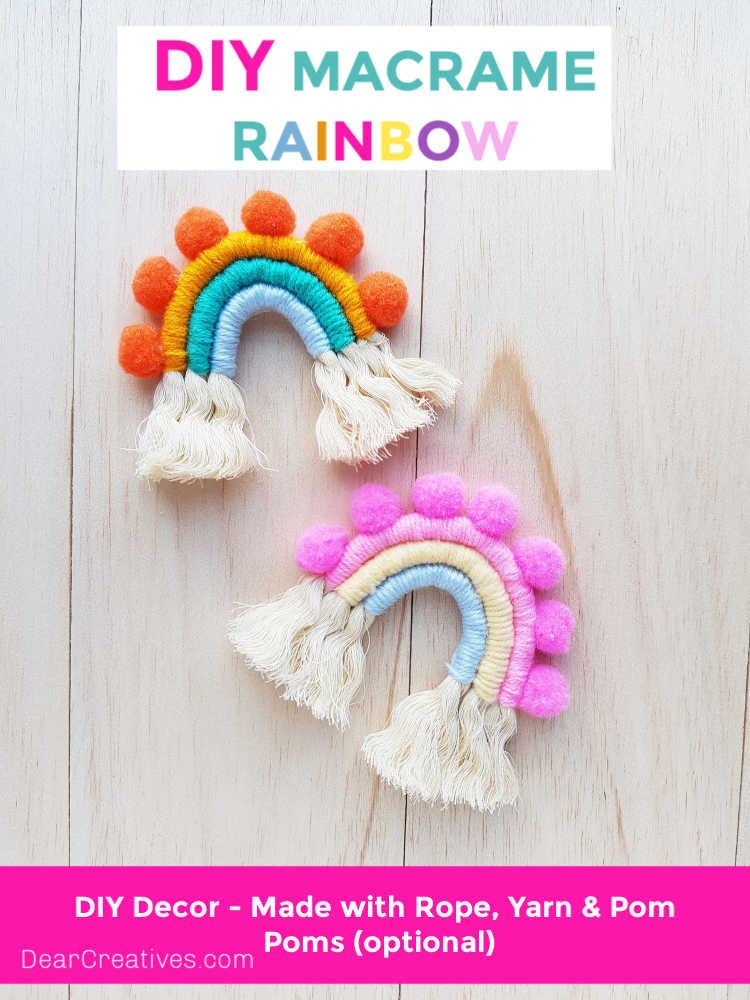
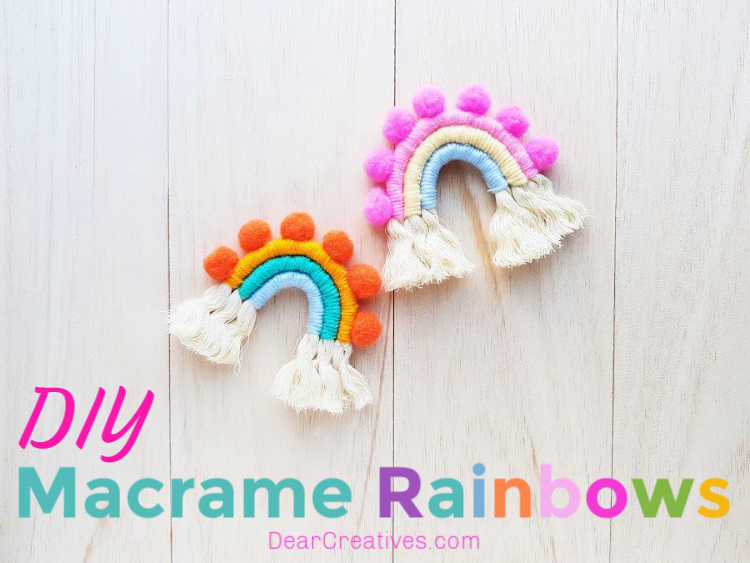
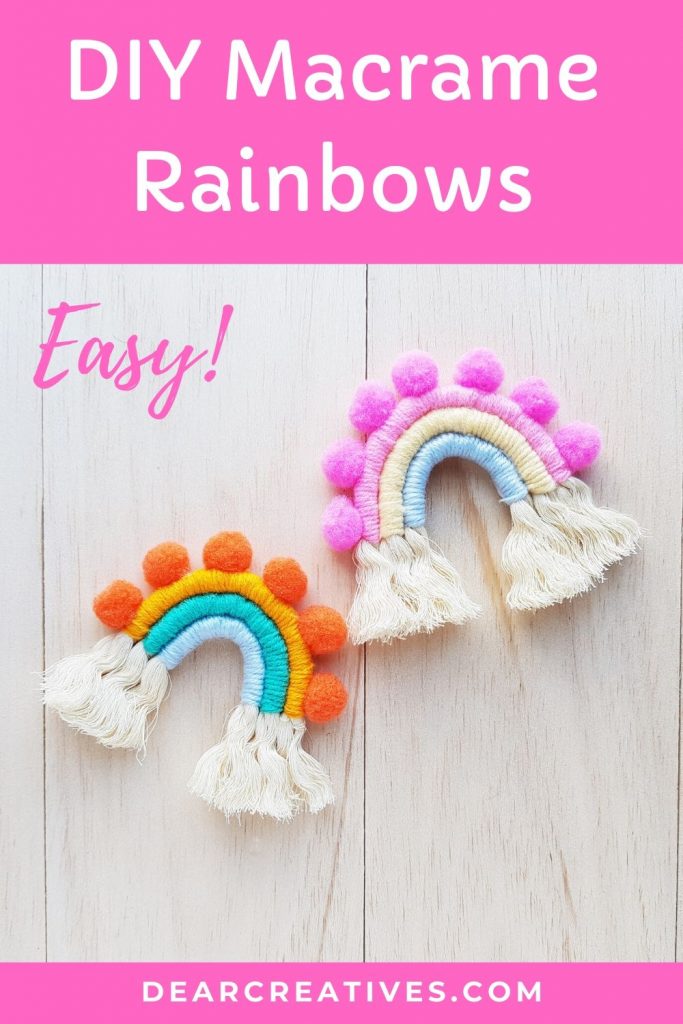
DIY Macrame Rainbow: When I was on Etsy, I kept seeing pretty rope Macrame Rainbows to hang on the wall. They come in all kinds of colors and sizes to hang for wall decor. But I didn’t want to buy one; I wanted to make a macrame rainbow. With a little bit of research, I did just that. Are you ready to make one, too? Let me show you how to DIY a Macrame Rainbow!
This is a beginner craft project and so easy to make! Although we have made this for a spring craft/summer craft, this craft can be made at any time of the year.
Rain or Shine, make this to brighten your day or someone else’s day! Make the project and enjoy hanging your macrame rainbow!
Macrame Rainbow
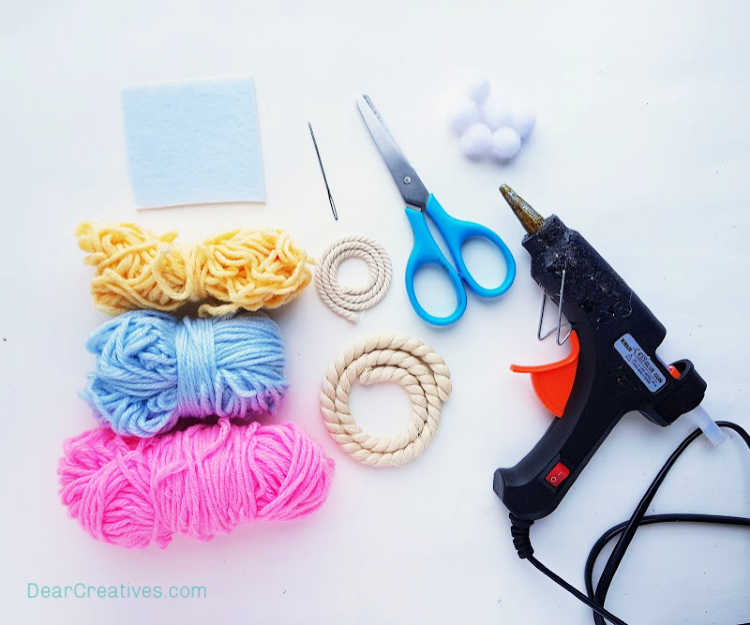
These are colorful rope rainbows made of cotton rope and colorful yarns. This design has backing of felt that will hold it together. With a few simple craft supplies, you can make a macrame rainbow. This is a fun DIY craft project anyone can do! Hang them in a nursery, kids room or office… You can adapt the size and colors to coordinate with your decor.
This is the perfect beginner project if you are just starting out with DIY macrame wall hangings. I will have a list to a few other related projects we want to try at the bottom of the post.
DIY MACRAME RAINBOW
This would make a perfect teen craft or adult craft. But tweens and older kids may do this with help/supervision.
Scotch Tape (Optional but helpful for taping off rope ends until assembled, Then remove and loosen ends).
Optionally, you can purchase a kit with all the supplies (minus scissors) on Etsy. Be sure to read each lister’s description to know what comes with the kit.
TIPS
You can use other sizes of rope, but make sure it’s natural cotton rope and that you have enough of the color you want to wrap the rope in.
The bigger the rope, the more yarn of the same color for your project. (especially if you are using yarn from leftover projects) And adjust the felt size for backing to the size needed.
If adding a hanging string, do that before wrapping the yarn. See the additional video at the end of the post and then follow the directions. You can hang them with command strips or by sliding them into a finish nail on the wall. Or add them to your cork boards/bulletin boards or decorative bulletin boards.
HOW TO MAKE A ROPE RAINBOW WALL HANGING
Instructions
Step -1:
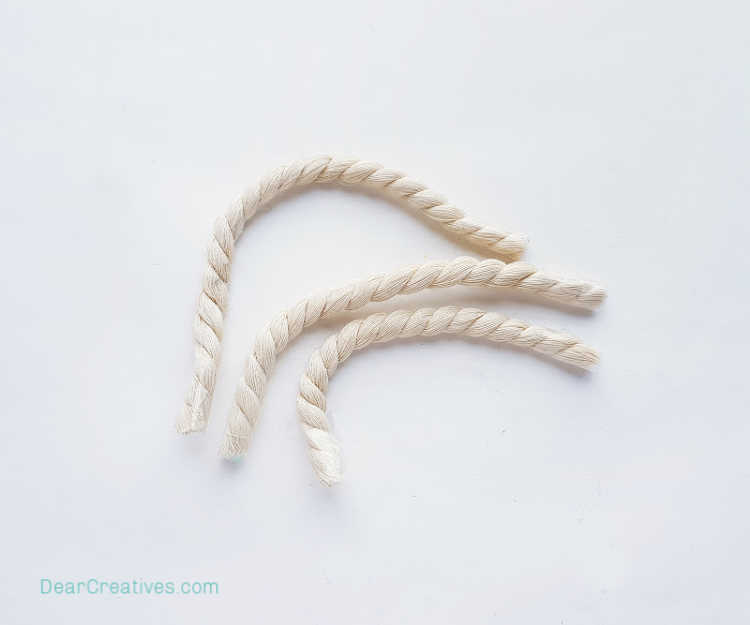
Determine the size of the macramé rainbow and then prepare 3 pieces of rope from the 1 cm thick rope bundle. Place the ropes on a flat surface and form the shape of a rainbow to measure the length required for each rope. Cut each rope according to the required size for the rainbow pattern.
Usescotch tape around very ends of the rope to keep it from fraying while working. You will remove it at the end of the project. This is optional depending on the type of rope, the way it frays or unravels, and the thickness you are working with.
Step -2:
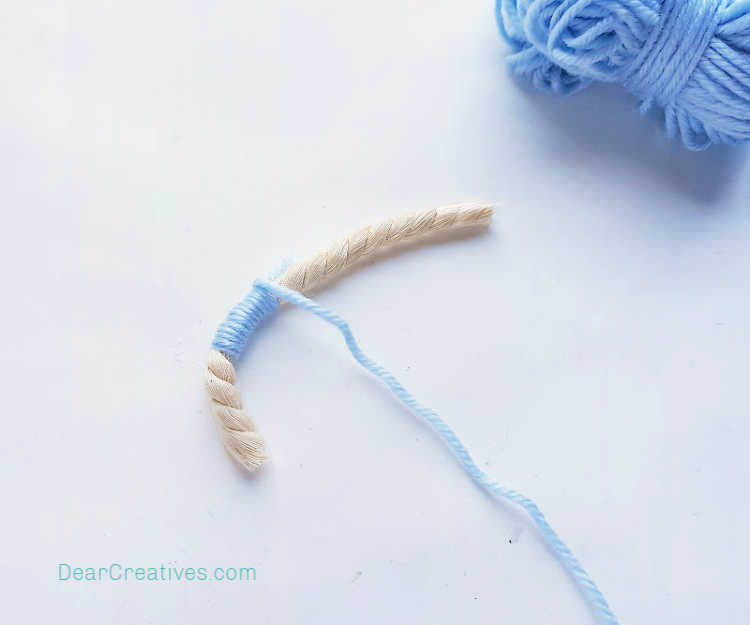
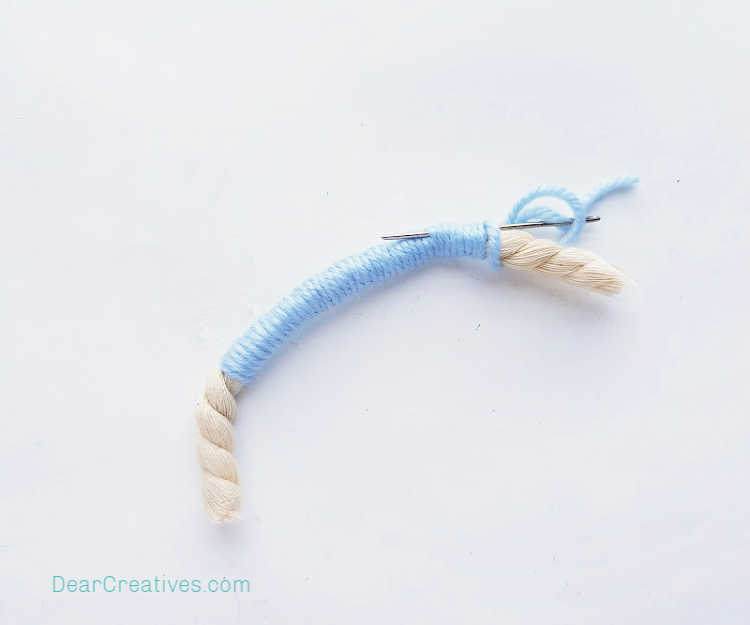
Grab ayarn bundleand any one of the rope cutouts. Leave an inch of the rope intact from either end and then tie the yarn around the rope tightly.
Step – 3:
Align the small open end of the tied yarn along the rope and start to wrap the yarn around the rope. Try to keep the wrapping as neat and adjacent as possible.
Step – 4:
Continue to wrap the yarn around the rope until an inch is left on the other end.
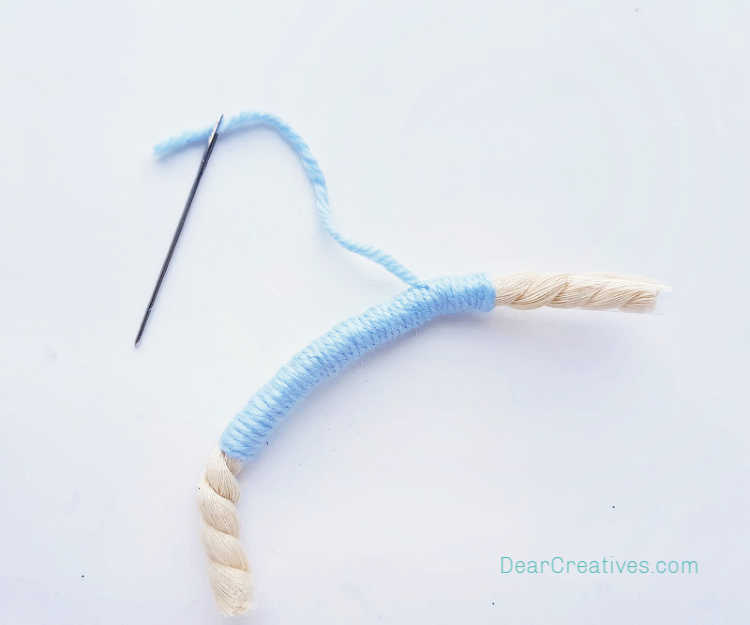
Step – 5: Keep 2 inches extra on the open end of the yarn and then insert a tapestry needle through its open end.
Step – 6:
Draw the needle through the wrapped yarn and draw it outwards after crossing 5 more wrappings. Cut off the extra yarn.
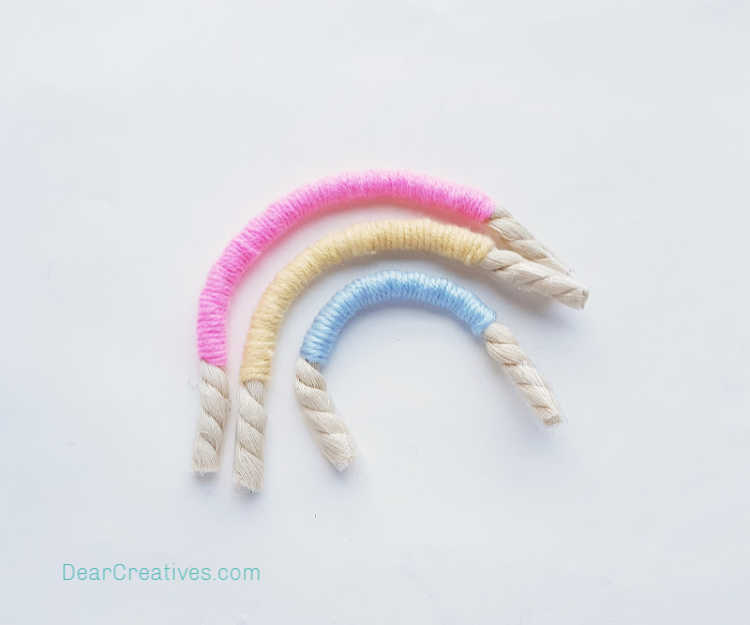
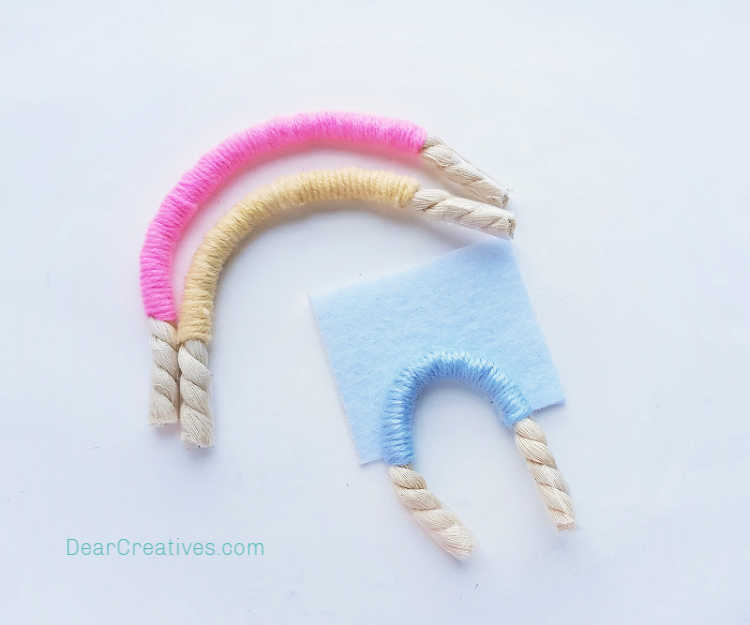
REPEAT STEPS 1-6, and similarly, prepare the rest of the ropes by wrapping them with different colored yarns. When all the ropes in rainbow colors are done, move on to the next steps. Attach ropes and make a backing.
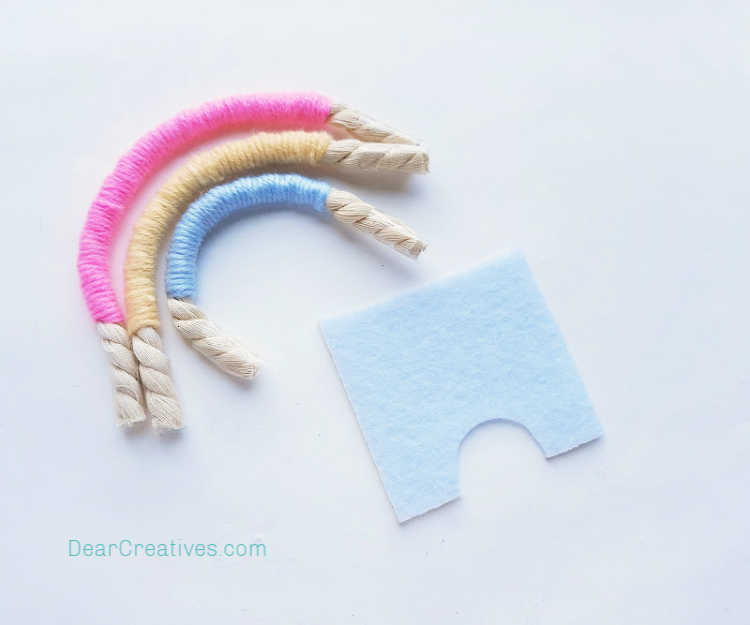
Step – 7:
Take a piece of the felt and cut an arch shape out of the felt from its bottom side.
Step – 8: Use hot glue (with your hot glue gun) to attach the shortest yarn wrapped rope around the curved birder of the felt (along the bottom side of the felt).
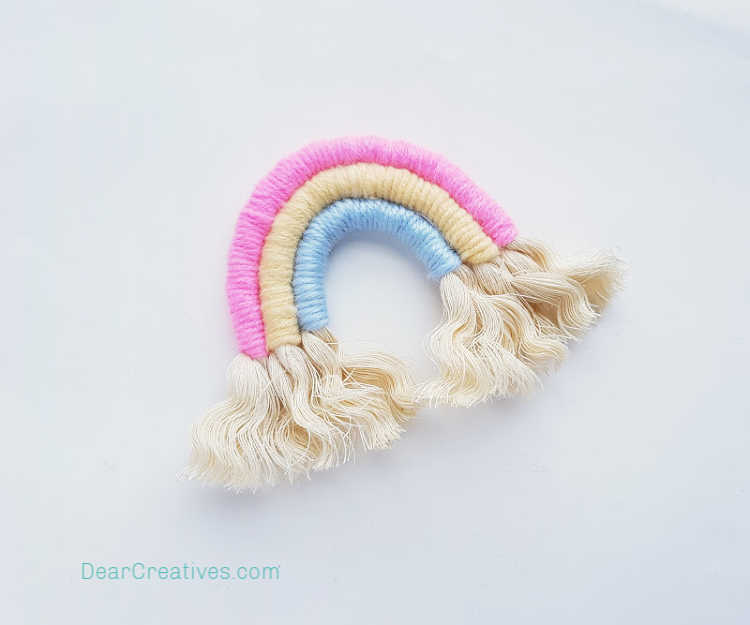
Step – 9: Attach the rest of the ropes one by one on the felt. (with hot glue) After attaching all the ropes on the felt, cut the felt along the outer border of the top rope. Step – 10: If you added scotch tape, remove it from the ends. Open and lose the twisted parts of the ropes on both open ends of the rainbow pattern.
Step – 11: Attach pompoms (with hot glue) along the top side of the macramé rainbow if you like.
Tada! You have made your home decor DIY to use!
Honestly, this would be such a fun summer kids craft, summer teen craft, or if you are just looking for a fun and easy adult craft. Are you looking for more things to make? See our list of other crafts to make below.
Too busy to make it now, Pin it for Laterand subscribe. Happy Crafting!
Do you want to add a string for hanging or see how to make it? Watch the video for instructions.
Would you rather buy one? Get a premade wall hanging; you can find them here (macrame rainbow wall hangings), and a larger version of this here (Pastel Fiber Rainbow Wall Hanging).
Here are a few other options for making and how to use macrame rainbow wall hangings.