Easy DIY Project Small Cabinet How To Build a Coffee Tea Cupboard
Easy DIY Project Small Cabinet – How To Build a small Cabinet You know the other day when I shared the small cabinet – coffee tea cupboard I painted with chalk paint and stenciled. I've gotten quite a few requests to share how we built it. What's great about this DIY project is that it isn't complicated. We'll show you how to make this step by step with images.
Of course, I wish I had the skills myself but, Mr. helped do this easy DIY project! The reality is I never learned to use a table saw. I wanted to take wood shop in middle school. But, back in the day they didn't let “girls” take wood shop. I come up with ideas. And then have my handy “Mr.” make it. Then he passes the projects back to me for painting. In the end, it's a win/win. If you don't have anyone to cut the wood, you can ask your local home center or lumber yard to cut them to size. Then follow the directions for building the small cabinet.
If this project seems too hard for you, be sure to check out How To Convert a Vanity to a Coffee Cart. Or
Easy DIY Project
How To Build a Small Cabinet
Coffee Tea Cupboard
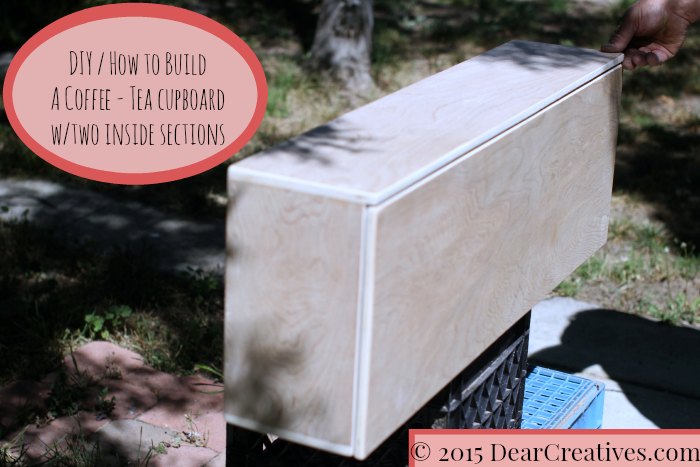
We used ours for a coffee tea cupboard. But, it can be used for any kind of small storage. Think, craft room cabinet, garage cabinet, playroom, kids room along with kitchen… To see our painted visit this post * Home Decor Ideas: Coffee Tea Chalky Finish Cabinet Now let's get started!
How To Build a Small Cabinet
DIY Coffee Tea Cupboard
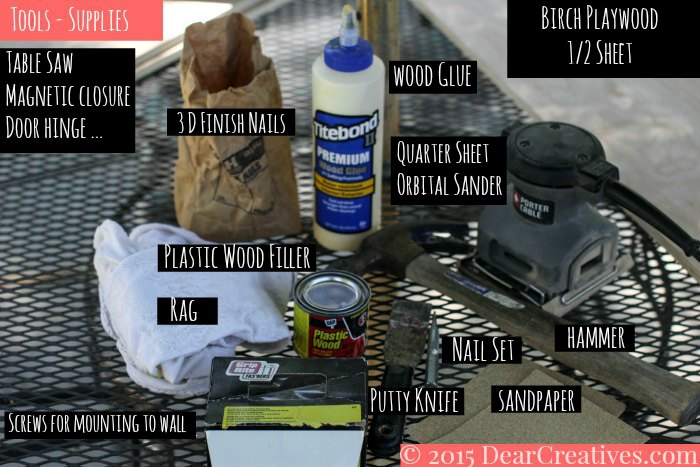
Supplies for Project
- Half Sheet of Birch Plywood
- Table Saw
- Titebond Wood Glue
- Quarter Sheet Orbital Sander
- Hammer Any will do but, I want to get this one for Mr. for Father's Day shhh it's our secret!
- Nail Set
- 3 D Finish Nails
- Putty knife
- Sandpaper
- Plastic Wood Filler
- Stud Finder
- Screws for mounting to wall
- Continuous Hinge/Piano Hinge
- Screwdriver
- Magnetic Latches (closures)
- Rag (for wiping excess glue)
Gather all your supplies. When you break down the list it seems like a lot but, you probably have quite a few of these tools in your toolbox. You won't need the magnetic latches (closures), screwdriver, and mounting screws until you're ready to finish and mount the cabinet. But, having them all together at once makes things go faster!
Here is what the small cabinet will look like when finished before painting it
Finished small cabinet before painting it.
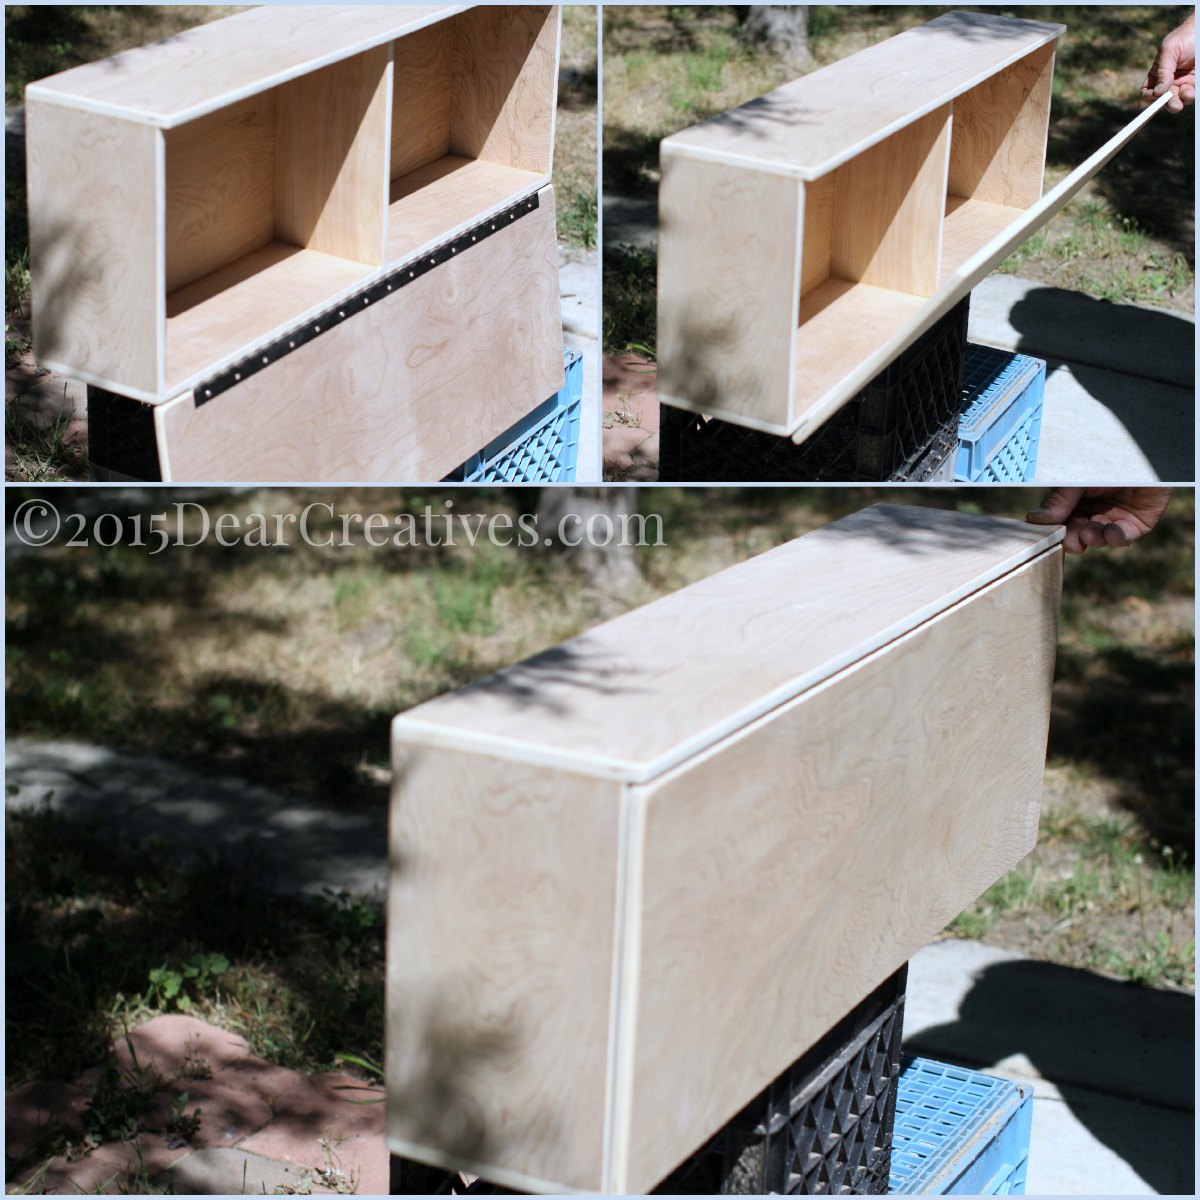
Here's what the small cabinet will look like when it's finished prior to painting. Click to enlarge the next three images to see them bigger.
Easy DIY Project Small Cabinet
How-To Steps For Making A Small Cabinet
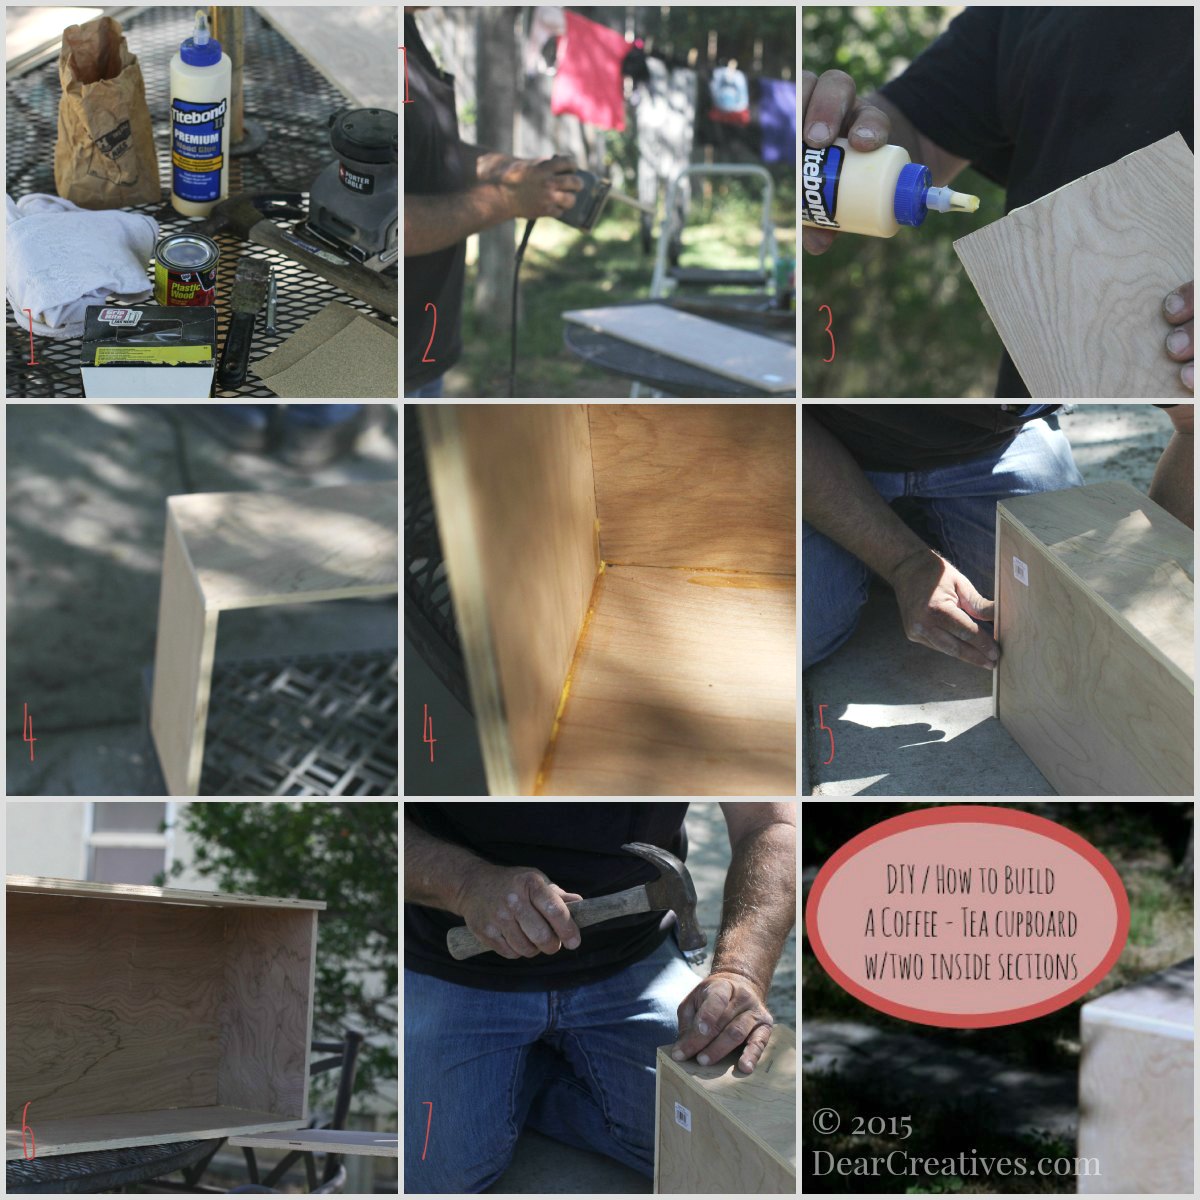
Set up and Wood sizing
Gather your tools and set them up where you'll be working. We used our patio area and milk creates for holding our project. If you have a workbench or table that will work too.
- Use wood safety tips and safety goggles Note: We are not liable for your use of this tutorial or directions. Use it at your own discretion. This tutorial is not meant for children!
Head to your table saw and cut your wood to size.
Wood Sizes for a small wood wall cabinet are as follows
- Cut the wood sizes to your own specifications our cabinet was made to fit above a coffee cart area I made. Ours is roughly 3′ wide by 2′ tall with a depth of 10″
Next, follow these steps for assembling the small wood cabinet:
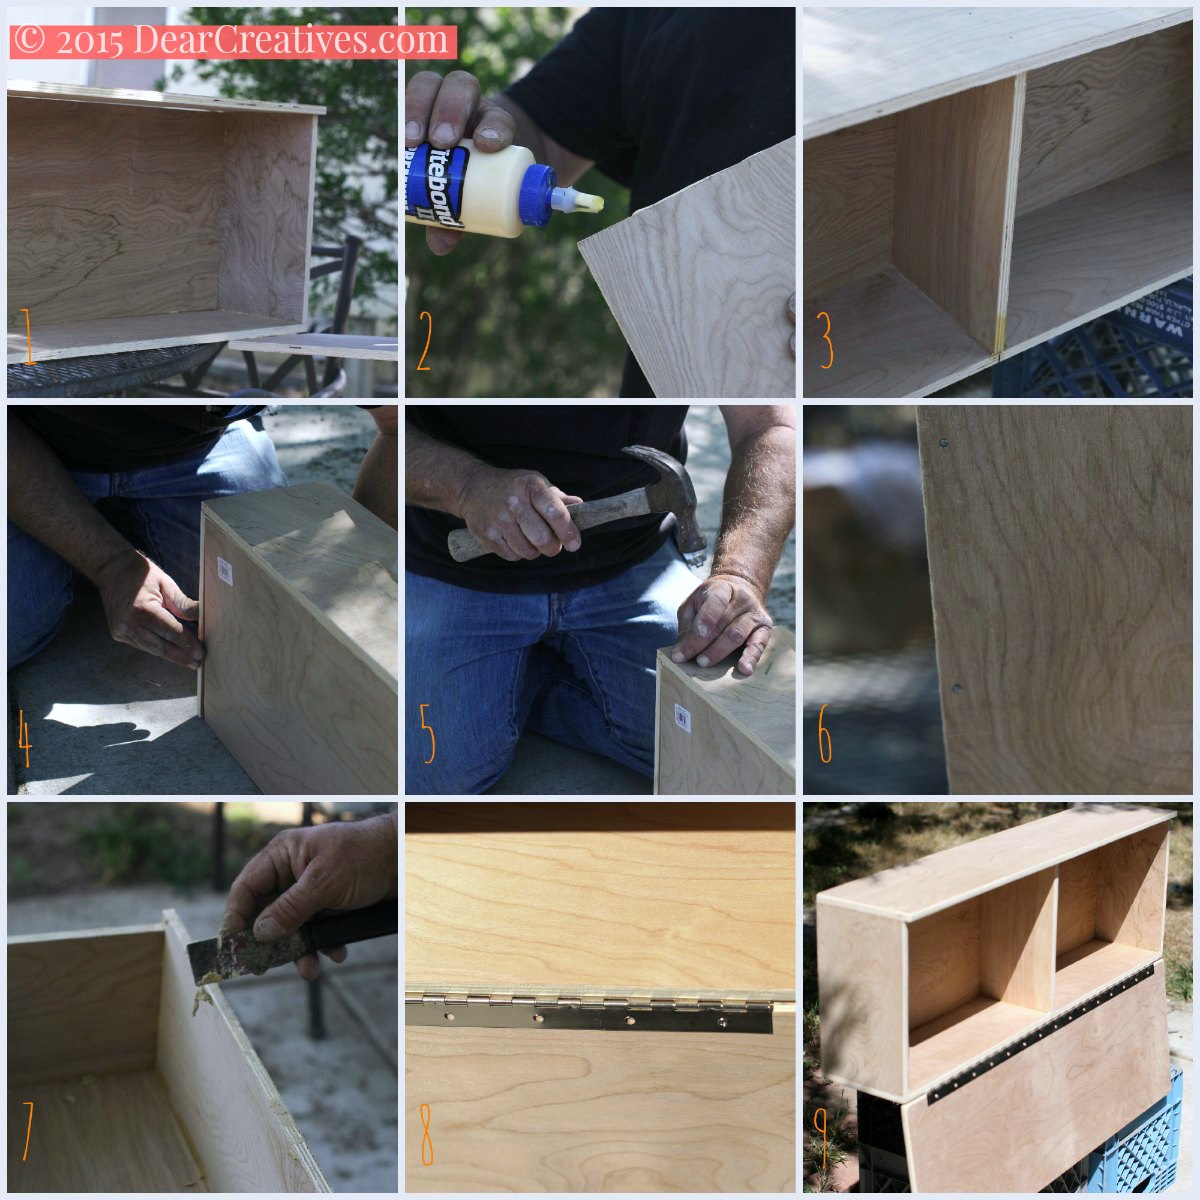
- glue sides to top ( we used Titebond wood glue)
- glue on back
- glue on bottom
- glue inside, divide (for support)
- Tip: Wipe excess glue off as you go along, additionally you can sand any spots you miss when it's completely dry
- Next, your going to space 4-6″ apart from your finish nails and nail all sides!
- Then set the nails with your nail set. After patch the indent areas with wood putty.
Easy DIY Project Small Cabinet Final Steps
Final Steps for Building a Small Cabinet
- Fill the rough areas with wood putty as seen in the image above. We are using a quick-dry product. After drying, you sand it, then when it's time to paint it'll be smooth!
- Sand all the edges (NOTE: we slightly rounded the corners before beginning the project)
- Fit the hinge to the cabinet door, setting your nail spots. We used a piano hinge. Then remove it for ease of painting. *put on after paint is dry
- Finish with a paint primer to seal the wood and let dry
- Then your cabinet is ready to paint! We used a Chalky Finish Paint
When completely dry you will add your piano (continuous) hinge back on. Add your closures which are the magnetic latches. If you want your cabinet door to stop level to the bottom you'll need to install a restraint chain to the insides and door. We didn't do this as I'm shorter and it's easier to reach in without. (see this article: How to keep cabinet doors from swinging open too far).
See The Painted Small Cabinet
See how to paint and stencil a small cabinet. This is how we finished our cabinet and hung it up!
We'd love to see your projects if you make one. If you have any questions just ask and we'll try to answer them for you. Be sure to email, comment with a picture on the FB page, or share your project at our weekly linky party!
Don't forget to see this easy DIY project finished with paint and stenciling! Home Decor Ideas: Coffee Tea Chalky Finish Cabinet
- To subscribe to view all our projects, crafts, and recipes.
- How to paint and stencil a small cabinet
- This is a super easy project,
- Now you have your coffee cabinet see these coffee posts.
- How to convert a vanity to a coffee cart and paint it.
- Convert a Dresser to a Kitchen Island
- Visit here to see our other DIY projects
Do you like DIY improvement projects? Or DIY home decor? Have you ever built a small cabinet?



Very cool! I love the stuff you guys come up with!
Thanks Lauren, You might of seen the post where I shared it painted already?
Hi Joanna, Then the Mr. is King for sure. Lol
You make it look easy! I have been wanting to try to learn how to build things from wood for a while and this post gives me some inspiration.
Hi Christie, I know what you mean. I only do the simple parts but, I have help with the more technical things and cutting. I wish I could do it all on my own too.