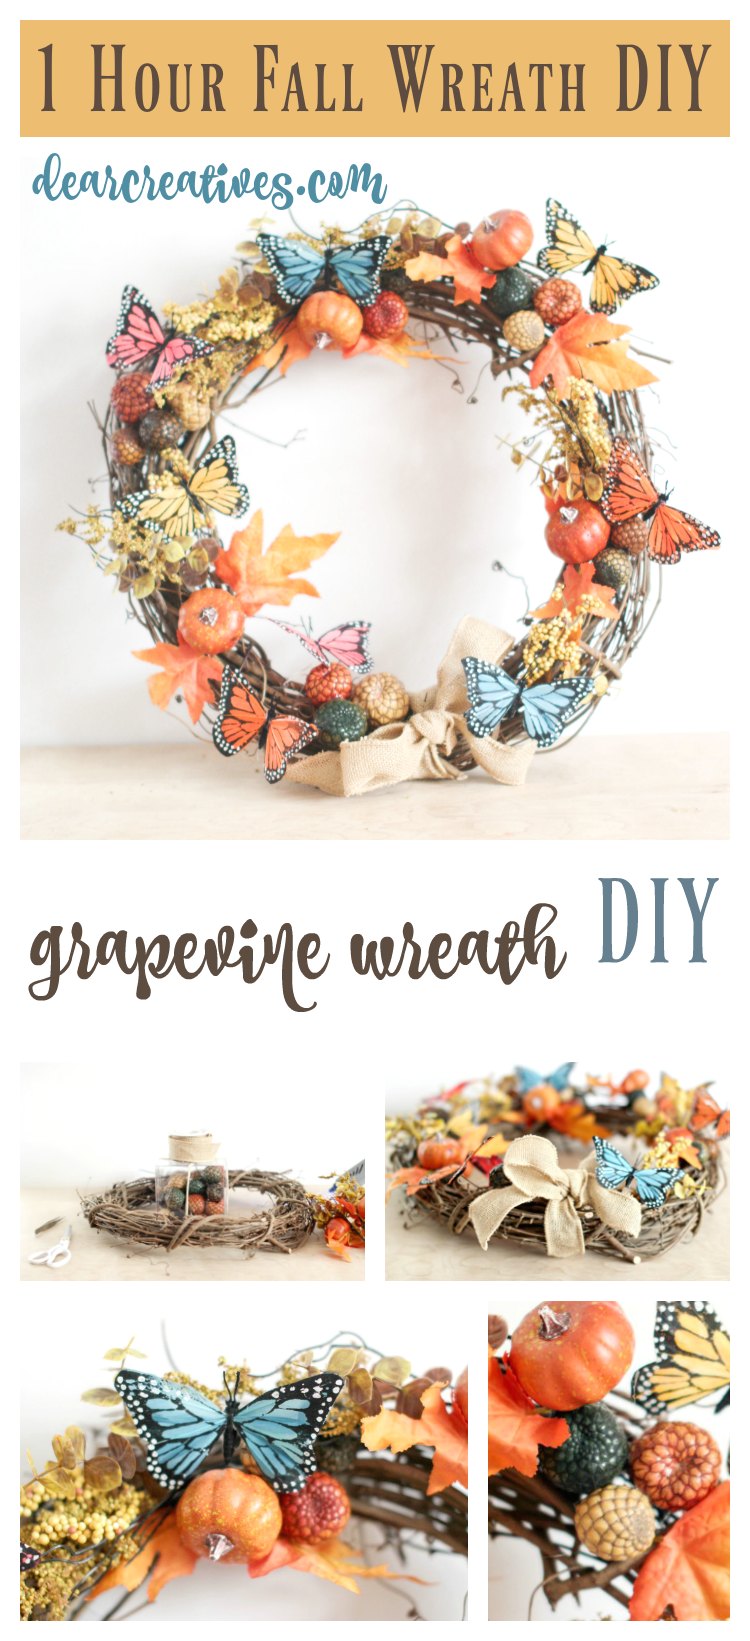
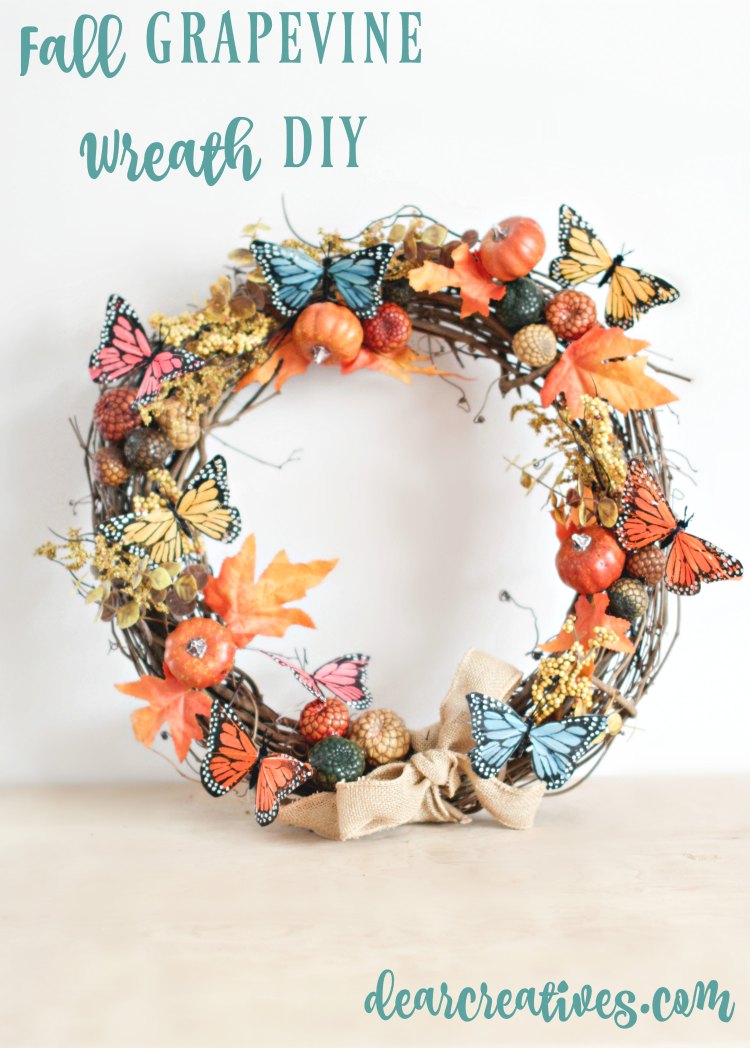
How To Decorate A Fall Wreath In An Hour
We had a thunderstorm the other day. Although it was hot and humid. Winds were blowing, clouds rolling in. It even rained! Signs that autumn is nearing? I hope. Determined to have fall style in my home, I decided to make a fall wreath, this one is quick and only took about 1 hour. I've had a few grapevine wreath ideas floating in my head. Finally, I was able to get to the craft table to create a newly decorated grapevine wreath. Today I'm going to share how to make a fall wreath.
I've included my video of how to decorate a wreath. Today's 1-hour fall wreath is quick and easy. I hope this helps you decorate one for your home. Seasonal wreaths are always nice to hang indoors or hang on your front door. Bonus, fun to make.
How To Make a Fall Wreath
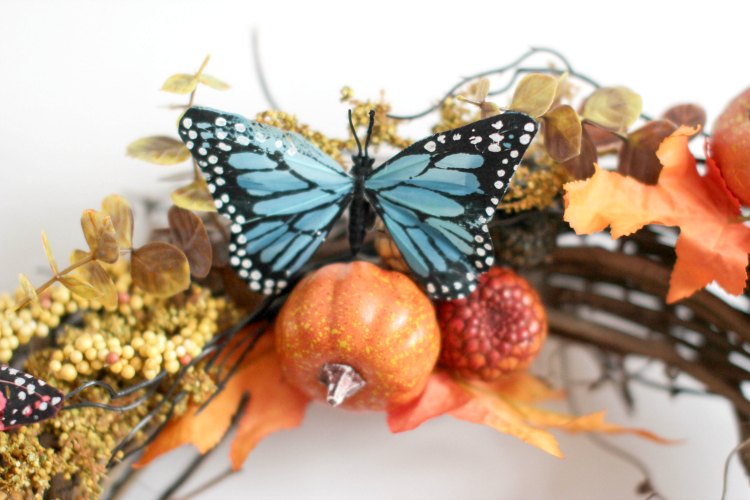
Why the butterflies on a fall wreath? Well, the butterflies migrate south of us for the winter season. This is one of a few fall home décor projects, and accents I worked on. I'll be sharing the other Fall Craft Ideas soon.
I made today's decorated wreath with an 18-inch grapevine wreath. This is a good size for a living room wall, dining room wall or front door. I'll be sharing a tutorial for a smaller one at another time. The supply list is to help you make your own wreath, especially if you are new to decorating wreaths.
Recently, I had grabbed a few supplies online, and at the craft store, so I was ready. A few supply resources are shown at the end of the post.
Supplies for making a fall grapevine wreath
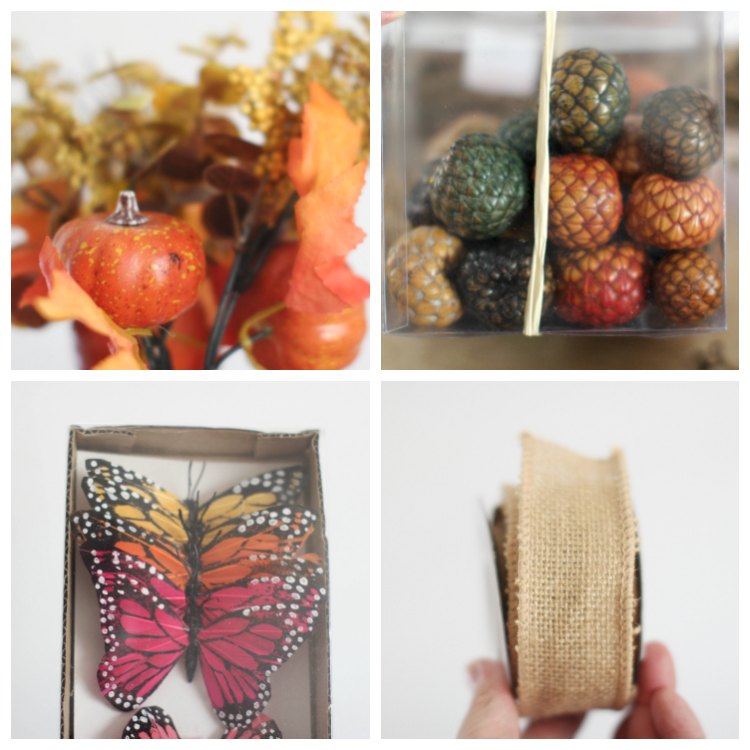
- Pre-made grapevine wreath ( 18 inch or other sizes)
- Wired Burlap Ribbon
- Acorn accents
- Floral Picks with Pumpkins
- Butterflies
- Fall Fillers
- Floral Paddle Wire
- Hot Glue Gun
- Glue Sticks
- Scissors
- Wire Cutters
- Tweezers
Video Tutorial later in the post.
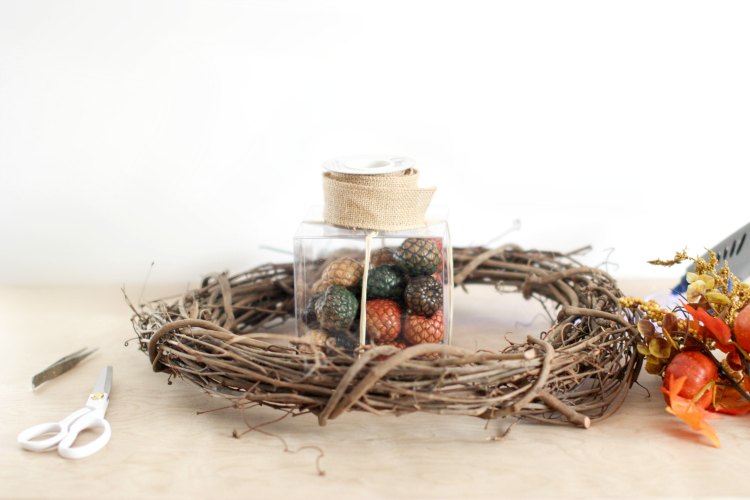
Here's where I got my fall fillers. Bonus, you can use extras in bowls or vases. I highly recommend using quality products especially if you will pack, and use your wreath annually.
DIY Fall Wreath
The first things you want to do when decorating your wreath
- Protect your work surface
- Gather your supplies
- Turn on your glue gun (have a plate or glass coaster under the glue gun to catch drips)
- Set your grapevine wreath onto your workspace
- Begin working
- If making a wired hanger on the back do it first by attaching wire through wreath and making a loop
- I space the 3 main floral picks at varied points to start (almost in a triangle pattern)
- Tie on burlap and make a bow at the bottom (or side). Use about 1 to 1 -1/2 yards (you'll find more bow tutorials along with my other wreaths here and here (for bows styled like gift bows)

Tips for decorating your grapevine wreath
- Use odd numbers when adding on your accent pieces, it creates visual interest.
- Create balance. Do this by visually looking at your wreath on the table and by lifting it, holding it as it would hang on the wall.
- Fill any holes to balance your wreath's decorations.
- Glue everything down to keep embellishments secure
Here's how I made my seasonal wreath
- New here? Subscribe, and never miss out on our grapevine wreath ideas. & Subscribe to Our New YouTube Channel too.
- Visit here for more Grapevine Wreath Ideas.
- Like today's post? Be sure to pin it here!
Still, don't have time to make a fall wreath, or aren't crafty? Check out these pretty pre-made ready to hang fall wreaths.
Fall Grapevine Wreath
Supplies for decorating fall wreaths


Theresa this is so pretty! You did an awesome job and your video makes it look so easy!
Thanks Stacie, It is easy to decorate the grapevine wreaths. Hope you get to try decorating one soon.