Step by Step How to Make a Wreath : Holiday Wreath #Diy
It’s not to late to make a holiday or winter wreath. I had the Mr. drop by our local Christmas tree lot when he was out and about on the weekend. He asked if they had any clippings. Plenty of lots will give you them for free, even if you don’t buy a tree if you just ask. Of course you can purchase the wrapped and ready to decorate wreath but, why when it’s super easy to do and doesn’t take long to make. Today I’m going to share how easy it is to make your own with this diy.
I ended up making a Christmas wreath because we aren’t putting up a big tree this year. It’s just the three of us for Christmas this year since we all got together for Thanksgiving. Sammie and I will probably go visiting after Christmas so we just didn’t want to make it a big deal but, still wanted to get into the holiday spirit with the wreath, decorating the mantel and piano. Plus adding a table top tree in the dining room. I decided to share how easy it is to make for anyone still wanting one for the door or indoors.
Materials needed to create a holiday or winter wreath:
- round metal wreath frame
- wire cutters
- pruning cutters
- holiday ribbon
- gold spray paint
- pine cones
- tree cuttings
- holly berry or other berry branches (please note some are poisonous take care around children and animals) or
- faux holly berry or berry branches
- optional holiday floral decorations
If you are going to spray paint anything like pine cones, berries or greenery do this prior to starting your wreath!
You can click image to enlarge
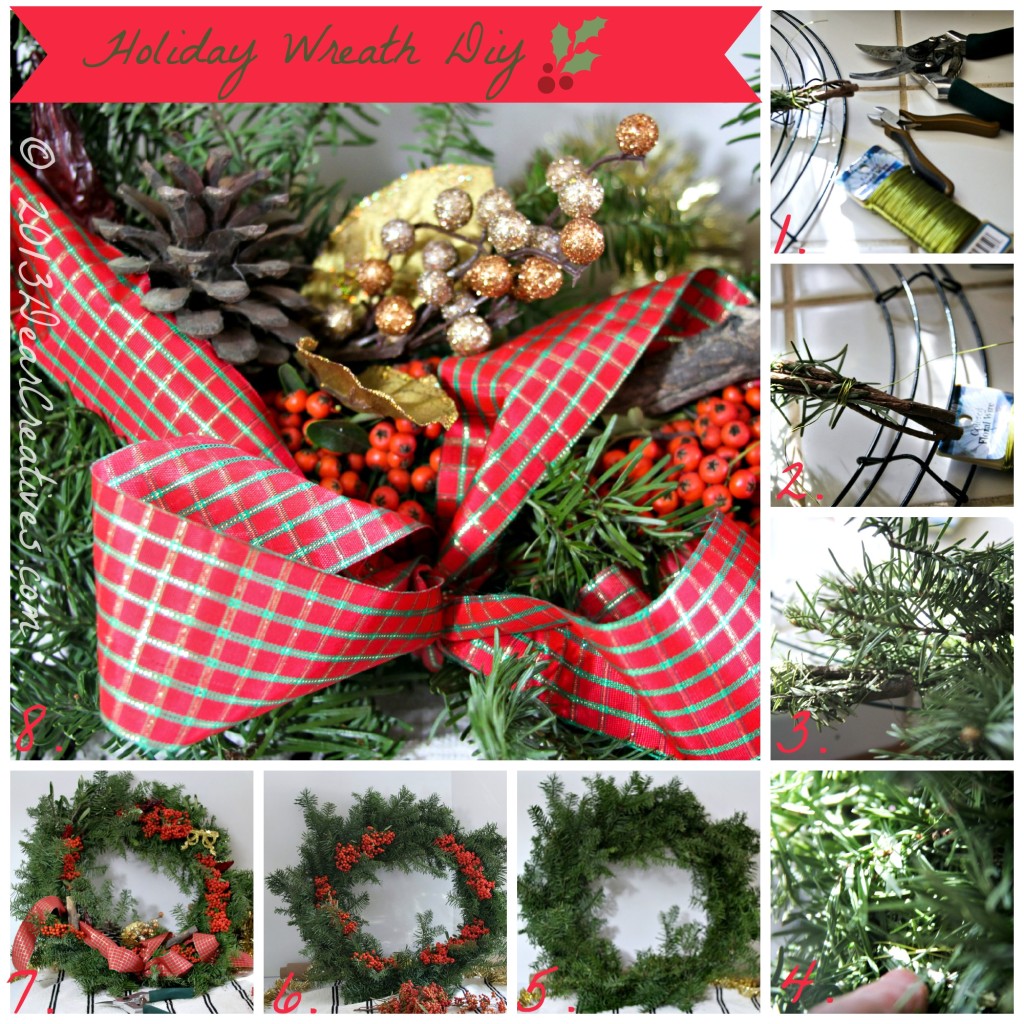
Steps to Creating your holiday wreath:
- Gather your supplies and put them in one spot, pre spray paint any clippings or berries you want gold (or any other color) let them dry while starting
- Start by clipping sections of the tree trimmings into workable parts then wire them together
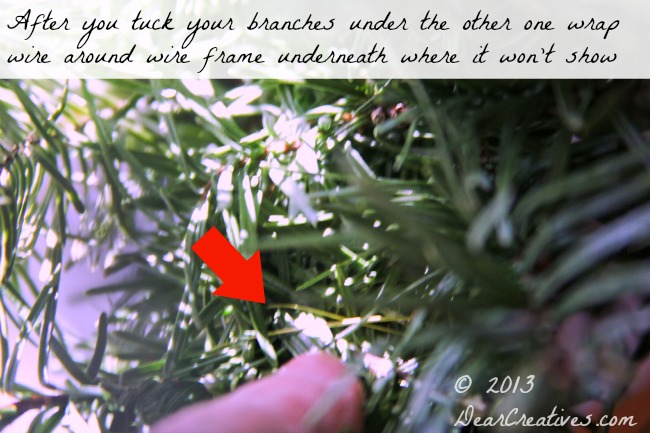
- Add to the wired frame after the first one is placed and wired on to frame tuck next ones under the previous one
- Then wrap them to the frame with a cris cross wire to attach
- Continue until your whole wire wreath is full of branch cuttings
- Next add some berries to the wreath attaching with wire where it won’t show
- Trim the outer part of your wreath to make it more round but, don’t obsess about it being perfect
- Tip hang it and look at it from a distance when trimming
- Decorate with other items until you love it!
Step Three detailed.
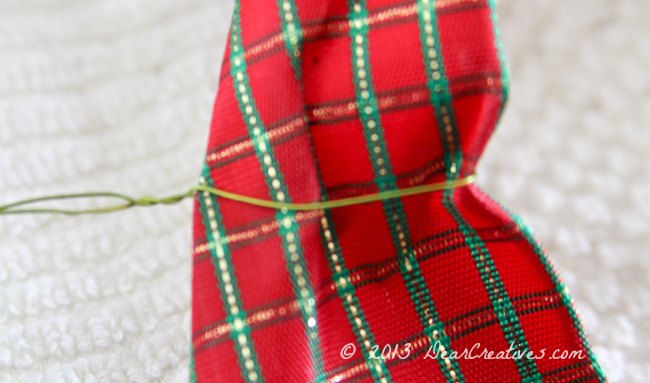
To create those flowing ribbons and placing your bows wrap wire around your ribbon and twist as shown in image above give yourself plenty of wire to work with for pulling and wiring to frame or to branches.
Next it’s all about the small details putting them in areas on the wreath and creating balance.
Sometimes it’s nice to let certain items to shoot out and be a focal point. Finish it up and find a place to hang your wreath! If needed you can create a wire loop attached to the back for hanging. I just hung mine from the wire form and it worked perfectly, but I wasn’t placing it on a door.
Once it was hung I trimmed up a few branches and then hung a Merry Christmas sign on it. Little changes still happened after this photo until it felt just right! (sorry about image quality it was taken late in day in our house) Be sure to subscribe or Like on Facebook to keep up with current posts.
Did you make a wreath this year? Did you put up a Christmas tree or decorate for the holidays?
I think you’ll love this affiliate offer!
- Get Better Homes and Gardens Magazine for as low as $.50 per issue! You’re sure to find ideas and tips more valuable than that in each copy.
- Makes a great holiday gift for a friend or relative!
- And when you subscribe, you’ll receive Better Homes and Gardens’ All-Time Favorites Cookbook ABSOLUTELY FREE!








How pretty and festive! Pinning- stopped by from DBB
Hi Jamie, Thanks so much for stopping by! Thanks for pinning. Happy Holidays!!
Theresa, this is such a beautiful wreath and I love that you used fresh greens! I totally understand about changes after you photographed it! 🙂 We always keep tweaking and changing things, which I think is just part of the creative process. Thank you for sharing and pinning! Hope you are having a merry and happy week!
Thank Cindy!Our holidays begin tomorrow with Sammie’s school break. Excited for some winter fun! Happy holidays to you!
I love the wreath! Funny story…my step-mom’s dad used to have a Christmas tree farm in the mountains of NC, and he’d open a lot near their house in Charlotte every year–so I spent several years working on a Christmas tree lot–and there are soooooooo many clippings (and so much sap!). I learned how to make the ones that are sold at a tree lot, but mine were never as pretty as yours! 🙂
Thank you so much for sharing this today on the Daily Blog Boost! I’m pinning this!
– Brooke –
Hi Brooke, Luckily my branches didn’t have a bunch of sap! Thanks for pinning. Sounds like that would of been fun working on the lot. I love the smell of trees. Happy holidays!