Teachers Gift Tutorial #GlueNGlitter
Dear Creatives, You know it’s that time when you are about to be looking for a “Teacher’s Gift”. I love giving heartfelt, useful, handmade gifts that are easy to make & inexpensive! Shh! Nobody has to know the inexpensive part! So today I am sharing a tutorial for a dressed up clip-board. Every teacher would appreciate one of these to have while checking off their to do lists!
First stop Walmart for some supplies such as Elmer’s CraftBond Memory Keeping products, Clip-board, Scrap-book stickers….You get the idea! If you want to see the great time Sammie and I had, what we saw and then purchased for our project visit This Moment! *Warning, Sammie can be a bit of a “ham” 😉
Project Time!
- Dear Creatives.com “Teacher’s Gift”
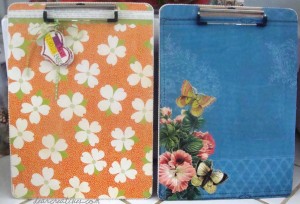
*Click to enlarge to see detail Samples of some finished.
Supplies used:
- Thicker Scrapbook Papers12x 12 – 2 for front & back, + 1 sheet coordinating paper to decorate & cover seams *3 total per Clip-board (ones with a waxy finish work great!)
- Elmer’s CraftBond “Clear” dual tip Glue Pen
- Elmer’s CraftBond Sparkle Glue “Classic” * choose colors to match your papers
- Elmer’s CraftBond Journaling Pen *in stores / *online Open Stock Paint Markers ” silver” (or) Elmer’s CraftBond Copper Paint- Pen
- E.K. Sucess brand Sticko Classmates (or any teacher related stickers)
- Wood heart tags 3 size 2-5/16″ w x1-11/16″ H x1/8″ T with 3/ 16″ hole ( found at any craft store)
- White craft paint 2oz. such as Americana * choose colors to match your project & stickers
- Scissors
- Paper Cutter * optional but great for long cuts
- 2 rolls – 1/8″ twisted cord white (comes in 3ft. but project takes a few inches more, you’ll need two per board) * choose color to match your project
- 1 roll of 1/8″ mini dot ribbon kiwi * choose color/ pattern to match your project
- Pencil for marking cut lines
- Clip-board (s) found in stationary section of Walmart or Office supply store * you may want to make more than 1
- Optional / Alternate glue products that may work for this project Elmer’s CraftBond glue pen wet/dry dual tip or Elmer’s CraftBond Scapbooking tape *double- sided
- Ruler
- Brayer * can use hands if you don’t own one
- Paint brush
- Small Jar of water
- Damp sponge or rag to wipe glue from fingers & project * if you use on paper wipe ever so lightly as not to tear your paper!
- Dry towel for fingers & project
If you craft quite a bit you are bound to have some of these items on hand. I did my projects both ways one with Elmer’s Craftbond clear dual tip glue pen & the other with Elmer’s scrapbook tape. Both work equally as well, just take your time not to rush. This project is rather quick. * At the bottom of the post a slide video of how to
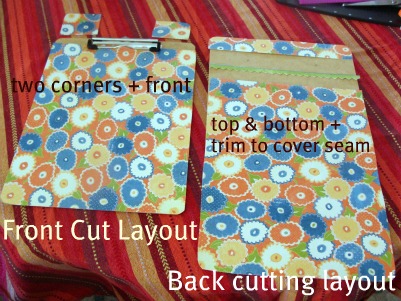
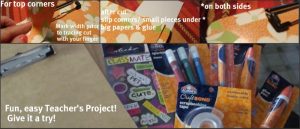
Shown in the picture above are the cuts you make to cover the clipboard. Use 12 x12 scrapbook papers you will need 2- of the same pattern/ color if you want both sides to match!
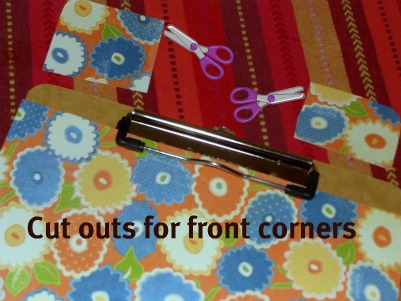
Lay the scrapbook paper face down & pencil where you will cut the paper to cover the clipboard. For front cuts lay front side down. There will be a section that won’t be covered from the cut. Use your scrap / left overs after you cut your main piece of scrapbook paper.
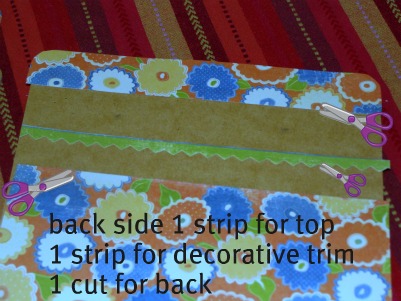
Now for the backside. Lay front side up and onto backside of your paper to make your cutting lines. After you cut the main scrapbook paper for the back side cut the top section with your scrap/left over piece. Then use any coordinating scrap piece of paper in any size & design you cut to cover the seams after the two main pieces are glued down.
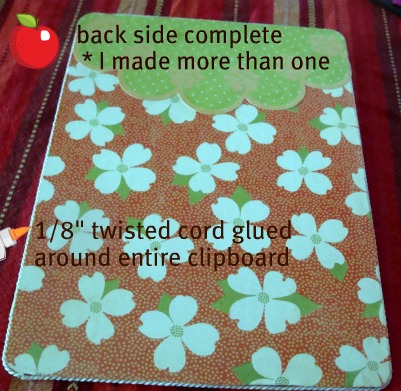
After both sides have all the papers glued. Trim any edges as needed but do not to over cut & take away from covering the clipboard. When completely dry, glue edges around your clipboard use the small tip on your glue pen *its the perfect size! and add your 1/8″ twisted cord all the way around the board. *you will need approx. 3′ 3″ which was over 1 roll
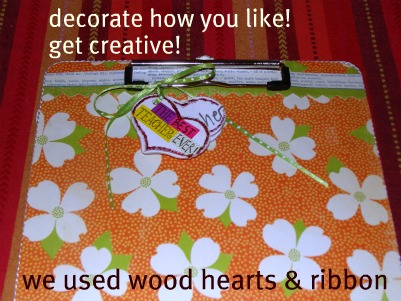
First we painted the wood hearts with two coats. * they have a hole for stringing ribbon You need to make sure they dry completely prior to adding stickers, journaling pen & or glitter glue. We also used the journaling pen around the edges of the hearts to add color. Allow your embellishments to dry completely prior to stringing them together. Use 1/8″ ribbon to tie them on to the clip part of the board. You can decorate over the metal under the clip if you like. I did on this one. Just use coordinating scrapbook papers if you choose to do this step.
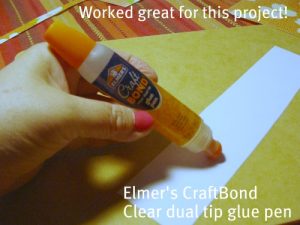
No need to over saturate paper. For small strips glue down the middle and all around the edges. For skinnier papers remember to use the small tip on the other side of glue pen!
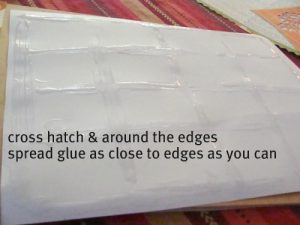
For larger paper cutting areas use a cross hatch over your paper surface & then all around the edges.
- Project Tips Click to enlarge view *use another window
I hope you get a chance to decorate a clipboard for your Teacher’s Gift! *Warning You might just end up making yourself one! You can find another teacher’s gift in my projects page! & I’ll be adding more too! If you like you can subscribe or follow via GFC & Tweet me! I’d love to have more Dear Creatives to connect with!
What is your favorite Teacher’s Gift you have made?
Thanks for visiting! Visit & Subscribe to My You Tube Channel if you like *more fun coming soon! This is my first tutorial! But, you can see videos of me painting!
What is you favorite Elmer’s Glue Product?
This project has been compensated as part of a social shopper insights study for Elmer’s #gluenglitter #collectivebias #CBias. All opinions are my own.

What a cute idea…and very practical, too!
Thanks Amy! Its a fun & easy project.
Beautifully done! Very impressive.
Great idea for a teacher gift! And the video is a great addition to the tutorial!!
Thanks! The video took forever to upload to YouTube. I thought I would never get it on there, lol. I’ll have to try a few more videos to get the hang of talking & doing at the same time & get better at them!
This looks great & is something I wouldn’t have even thought to make. Love it!
Thank you Amy! Glad you like it!
I love decorated clipboards and your detailed instructions were great! I sometimes use them as picture frames in my house 🙂 An excellent teacher’s gift!
That is a super idea Amanda!